


On Cooking: Pizza Dough 101
A few approaches to making thin crust dough basic to intermediate. And some tips, realizations and lessons learned along the way.

Why make your own pizza dough?
I mean, pizza shops are most everywhere in the US, right? Why would you or should you learn to make your own dough? Many of us have bought store made dough and made our own pizza that way. It’s a good start. But if you start to make your own dough, you’ll save money, improve your baking skills and be the star of the dinner party! If you haven’t baked with yeast before, pizza dough is one of the easier and more forgiving places to start. Come on, give it a go!
What’s making dough about?
It’s definitely work, kind of on the messy side as far as prep and cooking go…and then there is clean up. Well, yeah. It’s not an avocation for the apathetic. If you go into it without enthusiasm, a desire to learn over the long haul and some real goals for your pizza, you probably won’t get far. The first failed batch of dough might be your last. And you probably will have at least one failed batch. I did.
But if you stick with it, keep making dough until you get some results, you’ll be your own pizza boss. No one will ever be able to tell you what should and shouldn’t go on a pizza! You know what you like, right? Think about that. Pineapple, brussels sprouts, kimchi and peanut butter. Together! Go for it. And you get the pick the exact ingredients you want, not what a shop is trying to make money on.
For me, this is a top consideration: I want the best flour, best sauce, best toppings. And I am obviously a much better judge of that than anyone out there trying to make money on pizza. They have conflicting objectives. I do not. Can you relate? You choose and while good ingredients aren’t cheap, no one will be marking them up on your homemade pies.
So, within a handful sessions if you are a decent cook, you’ll make believers of yourself, your family and your friends. Seriously. You’ll be famous. You might blow up on Meta. You’ll certainly be pleasing yourself. That’s important.
It’s pretty easy to beat the average pizza shop. I mean it. Where I live, there isn’t a shop within 30 miles that I’ve been to that has impressed me. [There are 2 just outside 30 miles that are very good.] I’m really not that hard to please. For some reason, the US supports a lot of mediocre pizza shops. Other kinds of restaurants, if they are at the same level, they’re done in a year or less. Pizza is some kind of lowest-common-denominator. Salt-fat-carbs fast and reliably mediocre. I guess that’s a winner.
Getting started
For me, I got started making dough in college when a co-worker needed shift coverage in the restaurant where we both worked. He wanted to pursue a love interest. They had a romantic plan to get away together for a whole week. My first love in college also worked there and we were already together. I had karma to pay back.
The catch was he made the pizza dough and I didn’t know how. I had to take a crash course in dough making over two shifts. And then convince the boss I could do it.
I did.
The rest is history. Tasty history.
Over the years, I’ve kept at making dough and making pizza. And while my style and equipment have changed over time, I continue to make my own dough. I mostly make thinnish-crust pizza in the apizza [New Haven] and NY styles. I make a lot of pizza without red sauce though I do like it with pepperoni. For this post, I made all of the pizzas with red sauce and just cheese for the first round of testing. Then I ventured into some toppings, still with red sauce. I made a lot of dough, so over time I’ll probably add updates from future bakes—some of which will not feature red sauce. It’s not that I don’t like it, but I use a lot of subtle and often hard to get [foraged] toppings and want them to be central to the flavor. Wild mushrooms are a prime example. I like them with just cheese, olive oil and some herbs. Red sauce is pretty dominating for my palate with subtle toppings.
For this post, I’m going to focus on dough specifically. These doughs are for a thinnish crust pizza with toppings that go most of the way to the edge. And I’ve selected 3 methods that I have some experience with.
Styles of Pizza
In the US, pizza is like BBQ. Different regions have different styles, different shops serve different regional styles, regardless of where they are. Those of us who travel outside the US see even more variety. I’ve read more than one account from writers saying the best pizza they’ve had was in Japan. Go figure.
Even when using dough designed for thin crust pizza, you always have a choice on thickness based on the amount of dough you use per pizza and how much you stretch it. I like thinner crusts for my pizza, generally. And I typically top it close to the edge. In contrast, Neapolitan pizza has a large puffy crust edge with no toppings on it.
I do like a thicker crust pizza once in a while; I enjoy thick focaccia and pissaladière when I have it. And I have had some memorable Neapolitan pizza on occasion.
I’m not that experienced with the pan pizzas, Neapolitan and other styles. Youtube is your friend if you want to go deep there. No shortage of content on any style you are interested in.
Pizza Ovens
Another thing that varies quite a bit is oven type and temperature. In Naples, commercial pizza ovens are heated with coal and can be 900F. Pizzas cook in about 2 minutes. Similar ovens are used in shops in the US and baking times are similar.
For the home cook or small professional kitchen, there has been wave of consumer oriented pizza ovens coming on the market starting with the Ooni in 2012. They do claim to get 850-950F in their products, so that type of baking is available to the home cook. Know that these gas and multi-fuel ovens can achieve high temps and are often marketed as similar to the big ones, but they do not hold heat well in my experience despite their claims. If you go that route, become familiar with how to keep your oven hot and you’ll be fine. After all, it only needs to be hot for a few minutes per pizza when that hot.
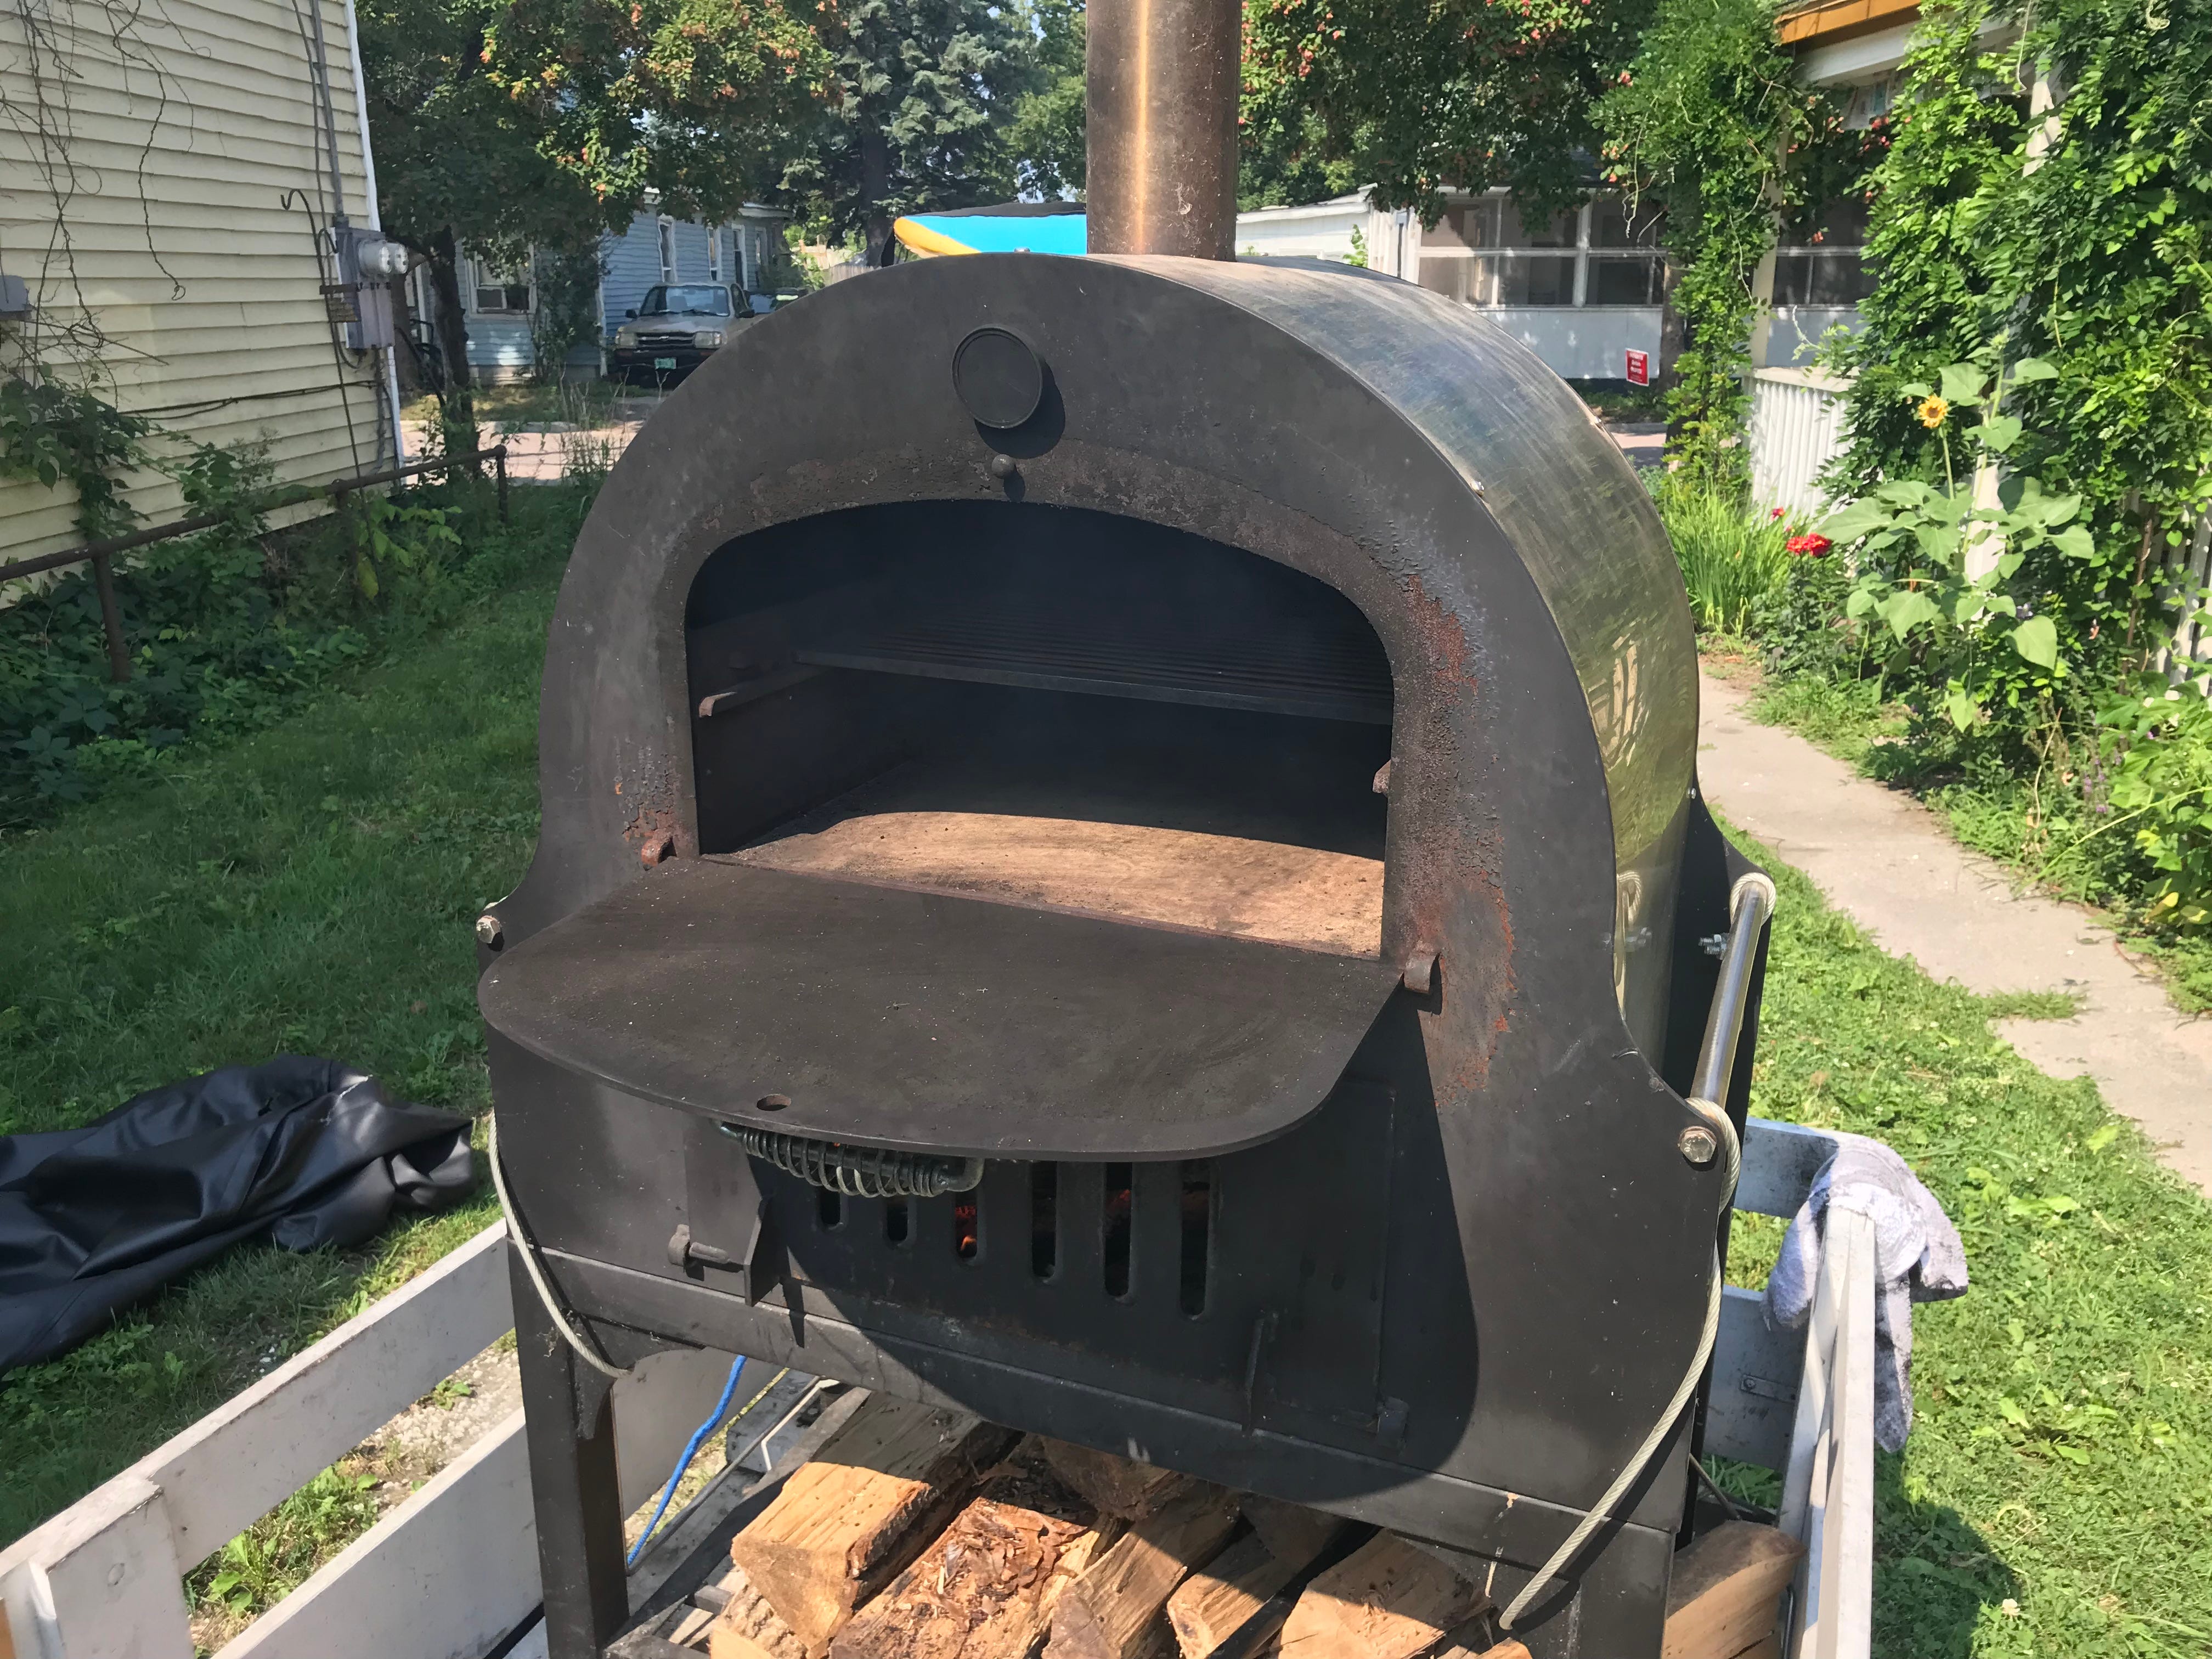
For a time, I had a steel wood-fired oven that would get very hot, but constant diligence was needed to keep a steady heat. When you are busy building and baking, it’s hard to tend the fire too if the oven doesn’t hold heat. I lost interest in it pretty fast and went back to using my kitchen oven.
Wood ovens burning hardwood routinely are in the 650-750F range depending on size, construction and wood. It’s possible to get them hotter, but this range has been what I’ve seen most in regular use. Generally, these are brick or clay ovens that are large and heavy. I’ve seen ovens that hold 3 pizzas on heavy trailers, once even on the bed of a Mack truck. Some homes have built in brick ovens. I’ve always lusted after these, but fate has it I probably won’t have one at home. Wood ovens make great pizza, are fun [and hot] to bake in and keep their heat superbly. I volunteered for a few years baking pizza in a mobile oven owned by NOFA. They rented it for events and it was great to bake in. It was an oven from Maine Wood Heat Company. Gorgeous ovens.
Home ovens, which most of us will use, will usually get us to around 550F. In my time, the home oven has proven itself to be capable of making excellent thin crust New Haven or NY-style pizza. I use a pizza stone which helps to transfer heat evenly to the pizza. Pan pizza is often cooked at even lower temps, so no issue there. It isn’t easy to get “leoparding,” those spots on the edge of the crust and on the bottom with home oven temps. If that is something you really want and are committed, consider a dedicated small pizza oven.
Ingredients
Flour:
I recently joined a FB group called “Pizza Dough Fanatics” to help research this post. I was immediately reminded I am a rank amateur pizza dough maker compared to people in the group. After poking around the group some, I came to the realization that I am pretty out of touch with how far “home” pizza makers go in the pursuit of their favorite pizza. It’s crazy. For discussions sake let’s say there are dozens of fancy pizza flours out there, many bakers are choosing to blend theirs.
Flour like the Caputo “00” flour are designed specifically for the hot 900F bakes. “00” is the finest grind of flour. I usually use King Arthur All-Purpose [AP] Flour for doughs for my kitchen oven. For this post, I used a mixture of King Arthur AP flour and their “00” pizza flour. This has the grind of “00” but is suitable for baking at 550F in a home oven. To avoid include a novella here about flour, I suggest you search pizza dough groups on FB and reddit. It’s a deep rabbit hole.
While I’m not covering it here, I do regularly make pizza dough with additions of rye flour, whole wheat flour, semolina flour and buckwheat flour. I’m especially fond of substituting about 5% rye to any recipe. It adds increases the complexity of flavor and adds some noticeable sweetness. Rye contains more natural sugars than wheat flour.
Salt:
I like to use sea salt vs refined salt, but in a pinch I use coarse salt. Pink salt also works. Salt retards fermentation, improving flavor and influencing the character of the finished dough. Sea salt and pink salt contain other minerals which add variety to the flavor.
Water:
I am blessed to have good well water. I noticed in the FB group that many are filtering their water for their doughs. I used tap water when I lived in Burlington, VT and it worked fine.
Yeast:
I buy baker’s yeast in bulk. I use a lot of it as I bake almost all of my bread with it.
Though like to make sourdough bread and keep a starter around, I have experimented with sourdough pizza dough. Despite some good results, I think I prefer pizza without the sour. Just my preference. There are many dedicated and enthusiastic sourdough aficionados in the FB Pizza Fanatics Group.
Diastatic Malt Powder:
Diastatic malt powder transforms ferments. It accelerates the conversion of starch in the flour to complex sugars. Its benefit is that it improves the extensibility of the dough. This is helpful when ferment time is limited. It also helps the dough to develop pleasing browning during the cooking phase.
Entry Level Pizza Doughs
For thinnish-crust pizzas styles
I tried to select some doughs that are a good starting point for anyone at the beginning of their homemade DIY pizza journey. These doughs can be mixed by hand with folding or kneading. They can also be mixed in a mixer like a Kitchenaid with a dough hook.
One of the things I didn’t do is give mix times [except for #2.] You’ll need to develop a sense for when your dough has “come together.” In basic terms, you want the dough to have become cohesive, meaning it wants to stick to itself more than it wants to stick to bowls, implements, dough hooks and you. If the dough is adhesive, meaning it sticks to you etc,…it needs more mixing time. Sometimes its good to let it sit for 5-10 minutes, then mix/fold/kneed some more. Eventually, when the gluten structure starts to develop it will become cohesive.
If the dough seems to be sticky because it’s just too wet, you may have too much water. With some experience, you’ll recognize this. Add a small handful more flour and do a couple more cycles of mix/fold/kneed. As dough matures, it tends to seem more hydrated [wet] so if it seems really wet when you are first working it, you’ll need to add some more flour. The recipes here are designed to not be too wet, so don’t overthink this in the beginning.
#1 Simple Pizza Dough
This is a good starting point. Simple and straightforward.
65% hydration
1000g AP flour
650g water
12g baker’s yeast
3g sugar
10g dimalt powder
15g EVOO
20g salt
Method:
Mix into a cohesive ball with dough hook or by hand. Dough should not stick to plastic, ceramic or metal surfaces. If it does, let rest a few minutes and then mix more until it becomes cohesive.
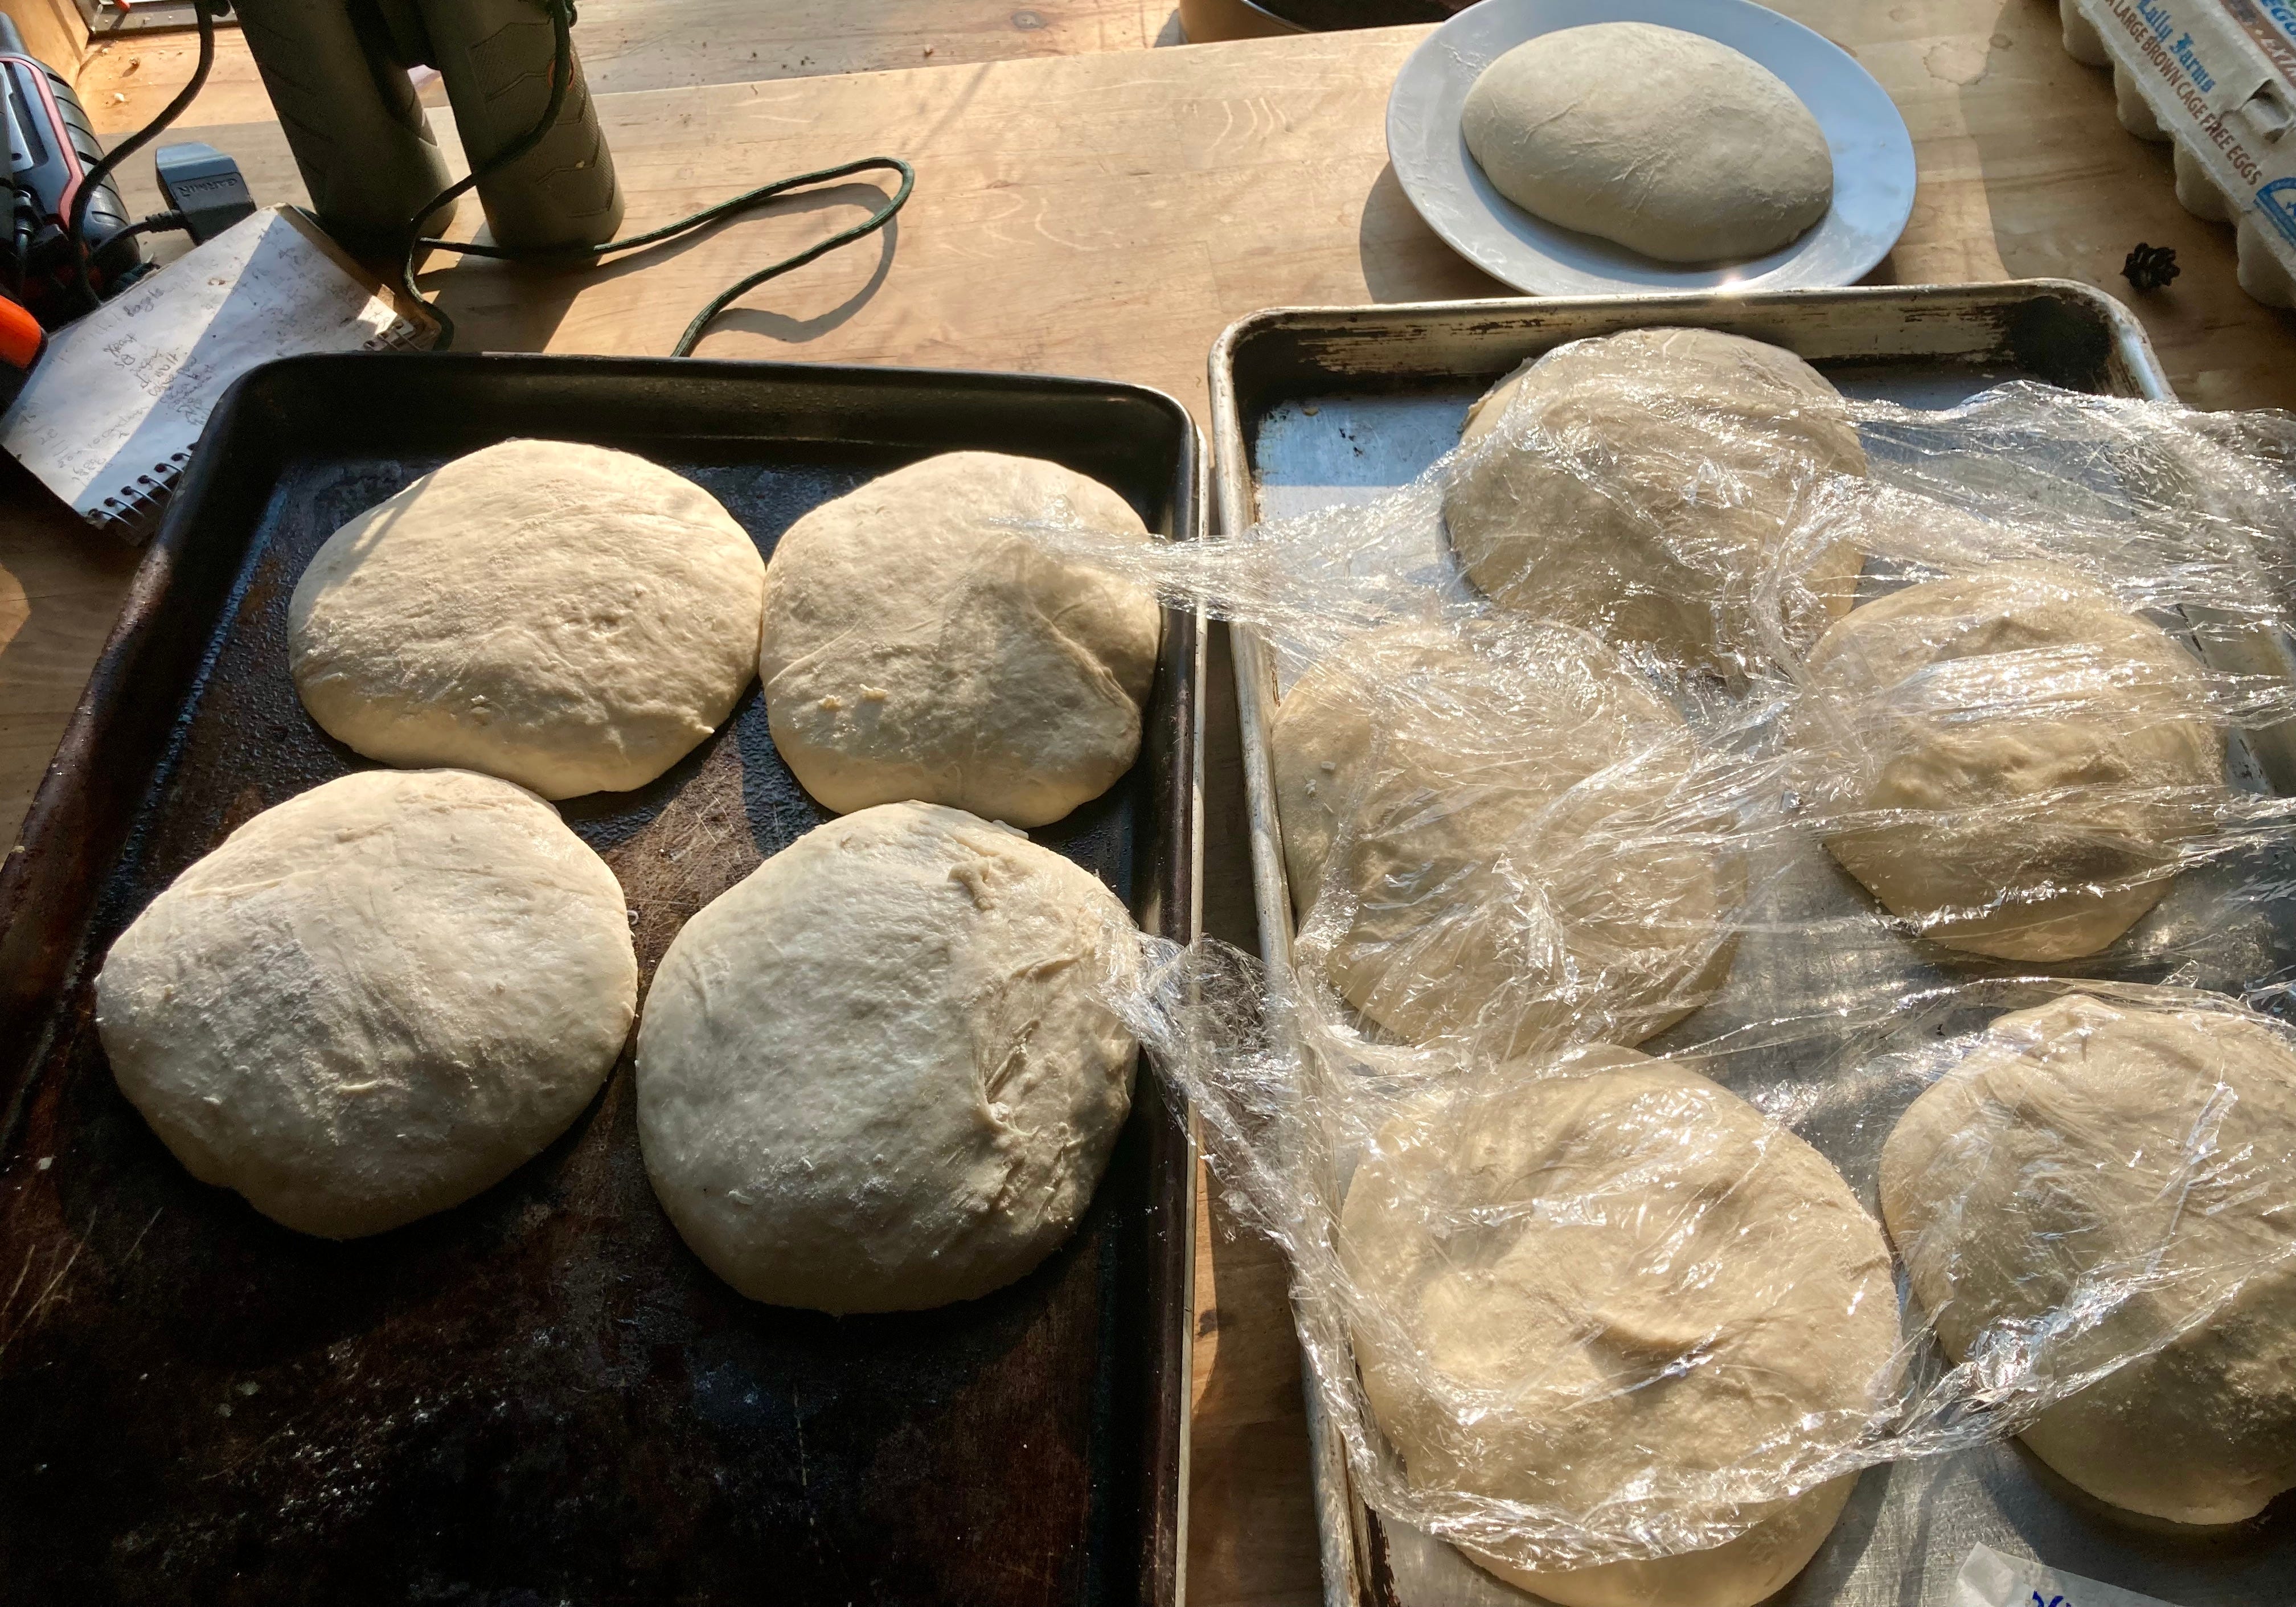
Let rise until doubled in bulk.
Divide.
Cover and refrigerate overnight.
Rest at room temperature 3-4 hours.
Stretch, assemble and bake
#2 Mixer Dough With Rests
I can’t remember where I got this recipe. I think from an older version of the Caputo flour website. Their flour is awesome, but their web stuff not so much. I believe their store site in US is down and has been for a week or so while I’ve been writing this post. You can buy their flour elsewhere or if they get their web act together.
65 % hydration
1000g AP Flour
650g water
12g baker’s yeast
15g Diastatic Malt Powder
20g salt
50g EVO
Method
Mix 95F water with 1/2 flour. Mix 1 minute.
Add remaining 1/2 flour. Mix 2 mins rest 10 minutes.
Add salt and malt powder. Mix 2 minutes rest 10 minutes
Add yeast. Mix 1 minute.
Add EVOO and mix 5minutes or until dough comes together and looks SMOOTH.
Rise 2-3 hours
Portion and ball dough
Refrigerate 24 hours
Proof at room temp 3-4 hours
Stretch, assemble and bake.
Poolish Dough
A poolish is a ferment of equal parts flour and water with a bit of yeast. In this recipe a bit of sugar is added to speed fermentation. You can omit it if you want. Most poolish methods do not have it. I used it as is.
73% hydration
400ml water
400gr 00 flour
5gr dried yeast
5gr honey
Mix and rest for one hour at room temperature, then 24 hrs in the fridge
Add poolish to a bowl
400ml water
400gr 00 flour
300gr bread flour (I like a chewier crust, so that's why I add bread flour, can use 00 throughout)
25gr salt
10gr olive oil
10g diastatic malt powder
Melt the poolish in the water with the salt and olive oil
Add the flour and knead, fold or mix to form a dough
Cover and leave at room temperature for 2 hours in an oiled bowl
Form the dough balls (six) and place them in a tray, covered overnight in refrigerator
Let dough come to room temp for 2-3 hours
Stretch, assemble and bake.
Assembly
I plan to cover this more in future posts on pizza. But there a few tips that are worth mentioning.
Stretching:
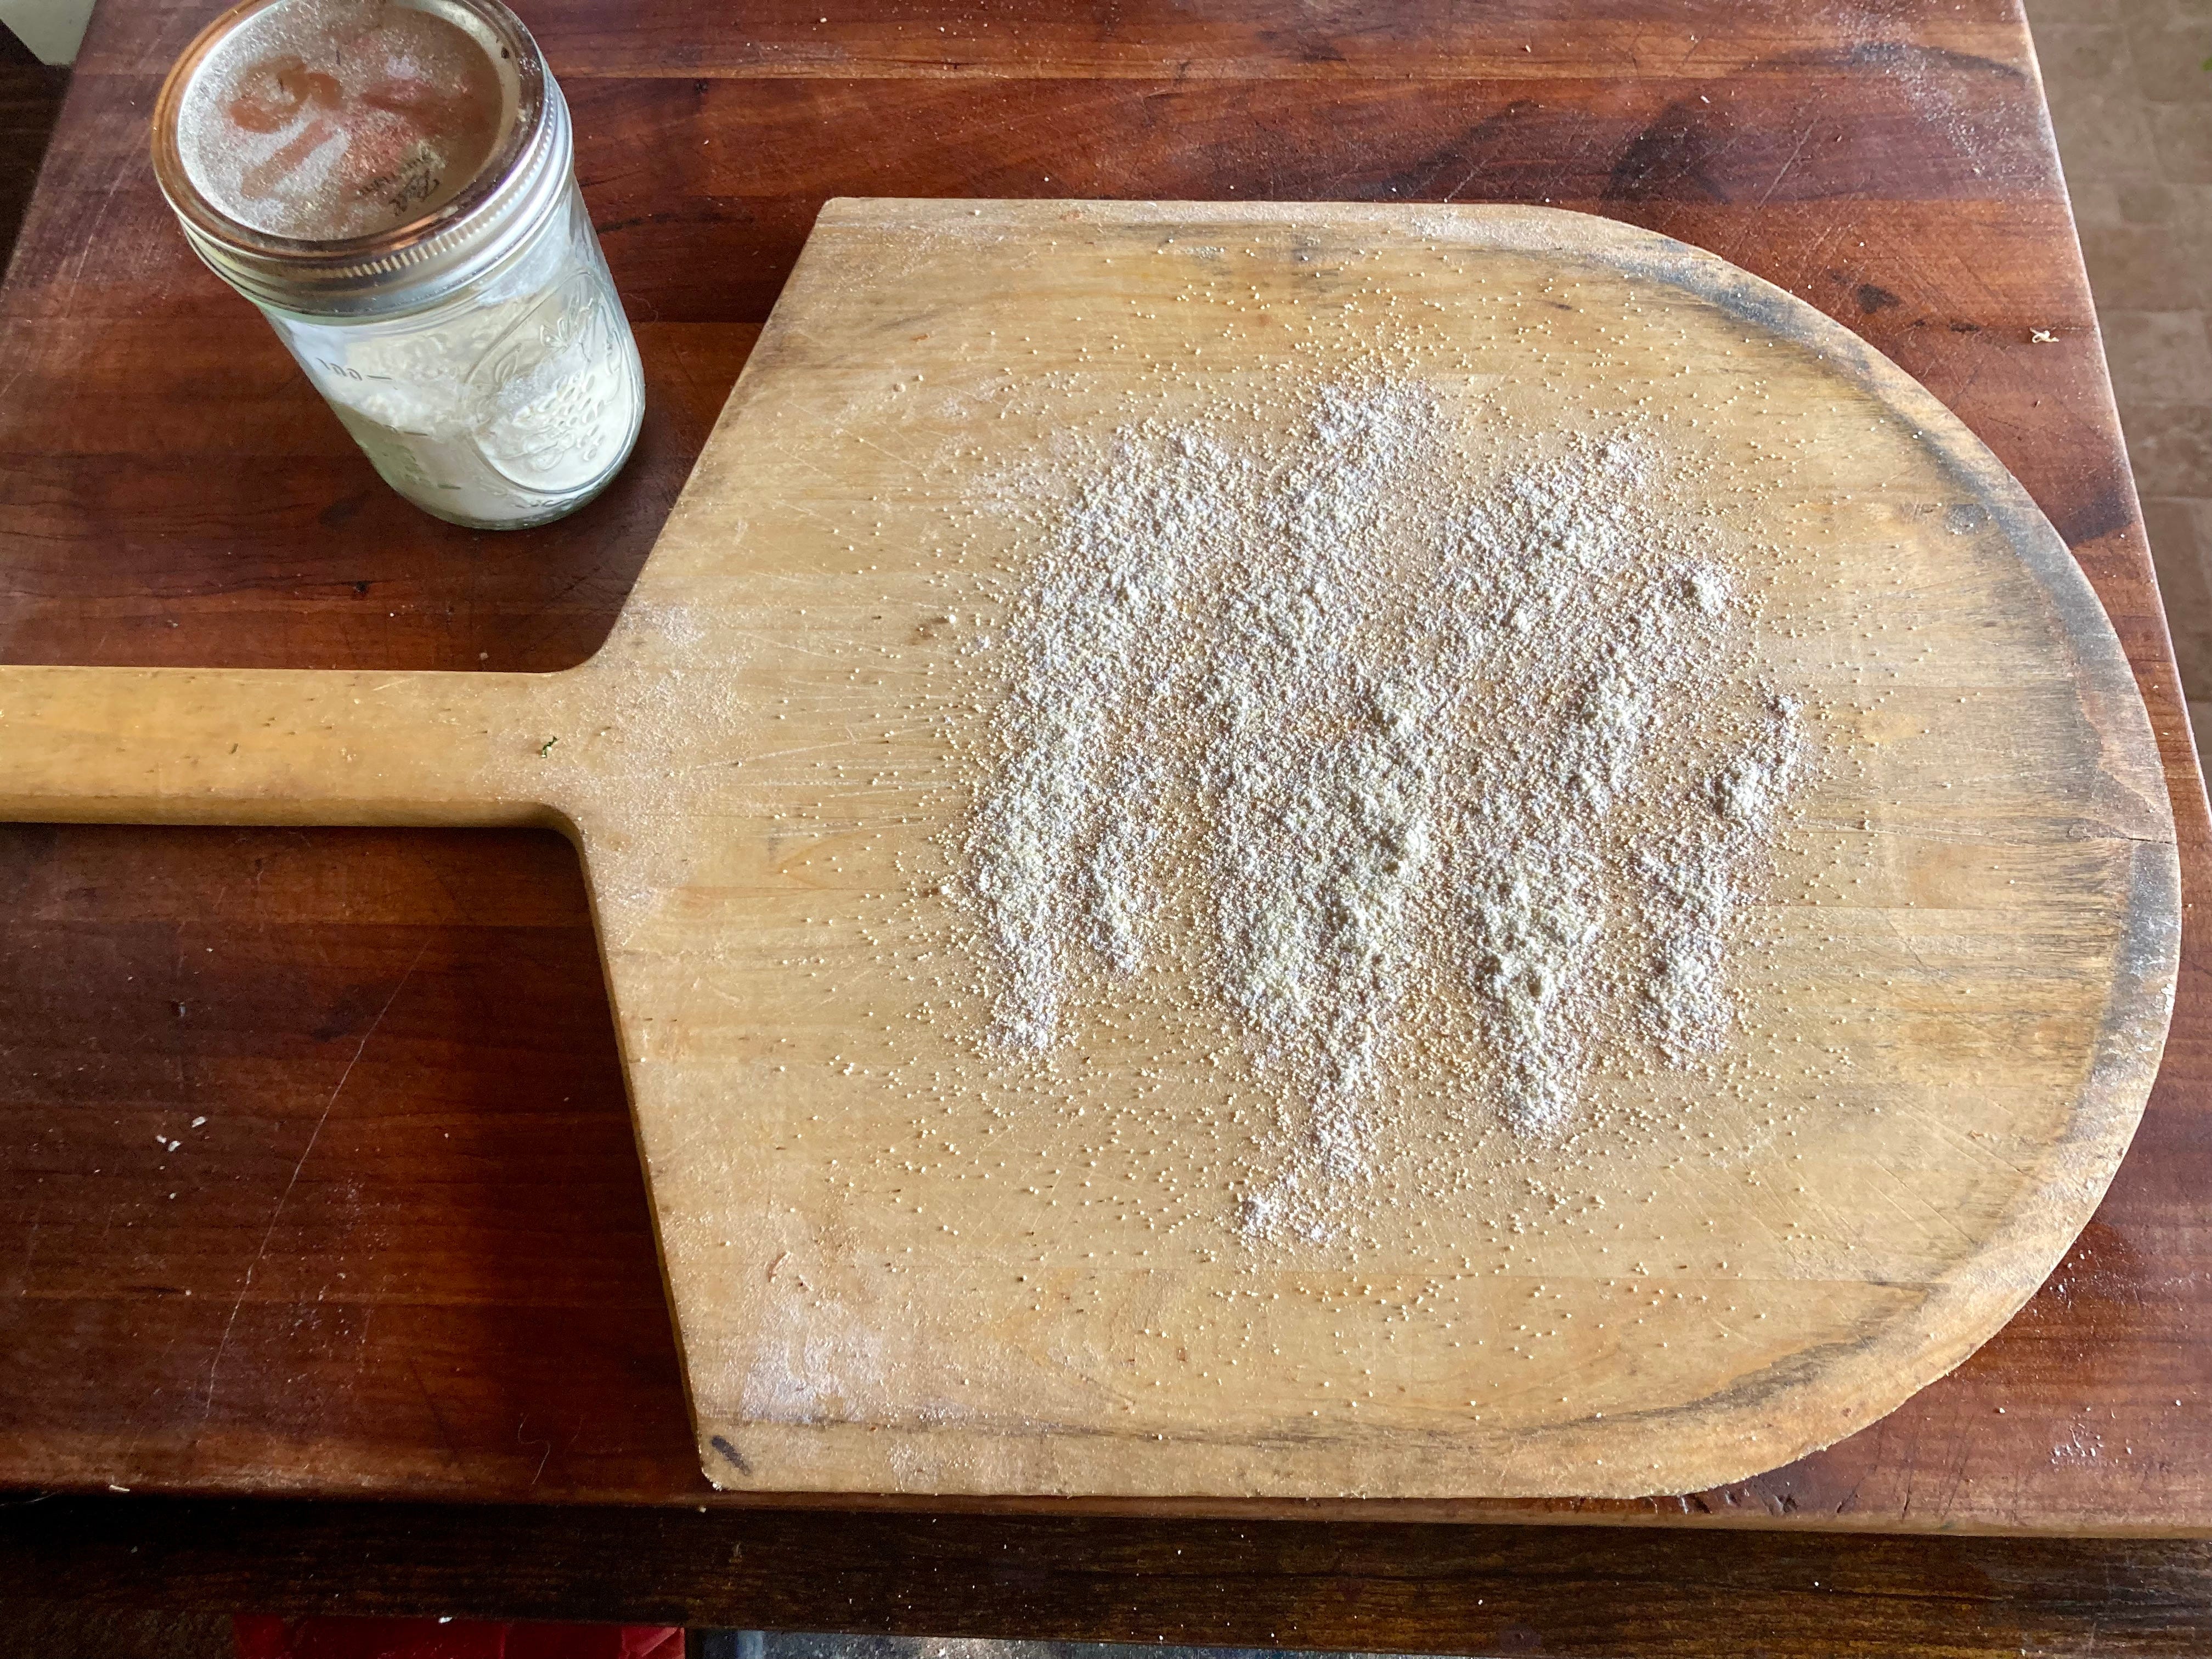
Avoid rolling out your dough. It will work in a pinch if your dough is too elastic and not extensible. I recommend “bench stretching” and “hand stretching.” Spinning over your head and all that is great and does help to make a round dough. But it takes practice and gets flour everywhere that someone will expect you to clean up. Ask me how I know!
You want some flour on your peel or platter. If your dough sticks, especially with toppings on it, it’s not easy to get more flour underneath. Start with a generous amount and then work towards using less over time. It ends up under your pizza on your platter or stone, where it will eventually char and burn. Or it’ll stick to the bottom of your pie. With some practice you’ll figure it out.
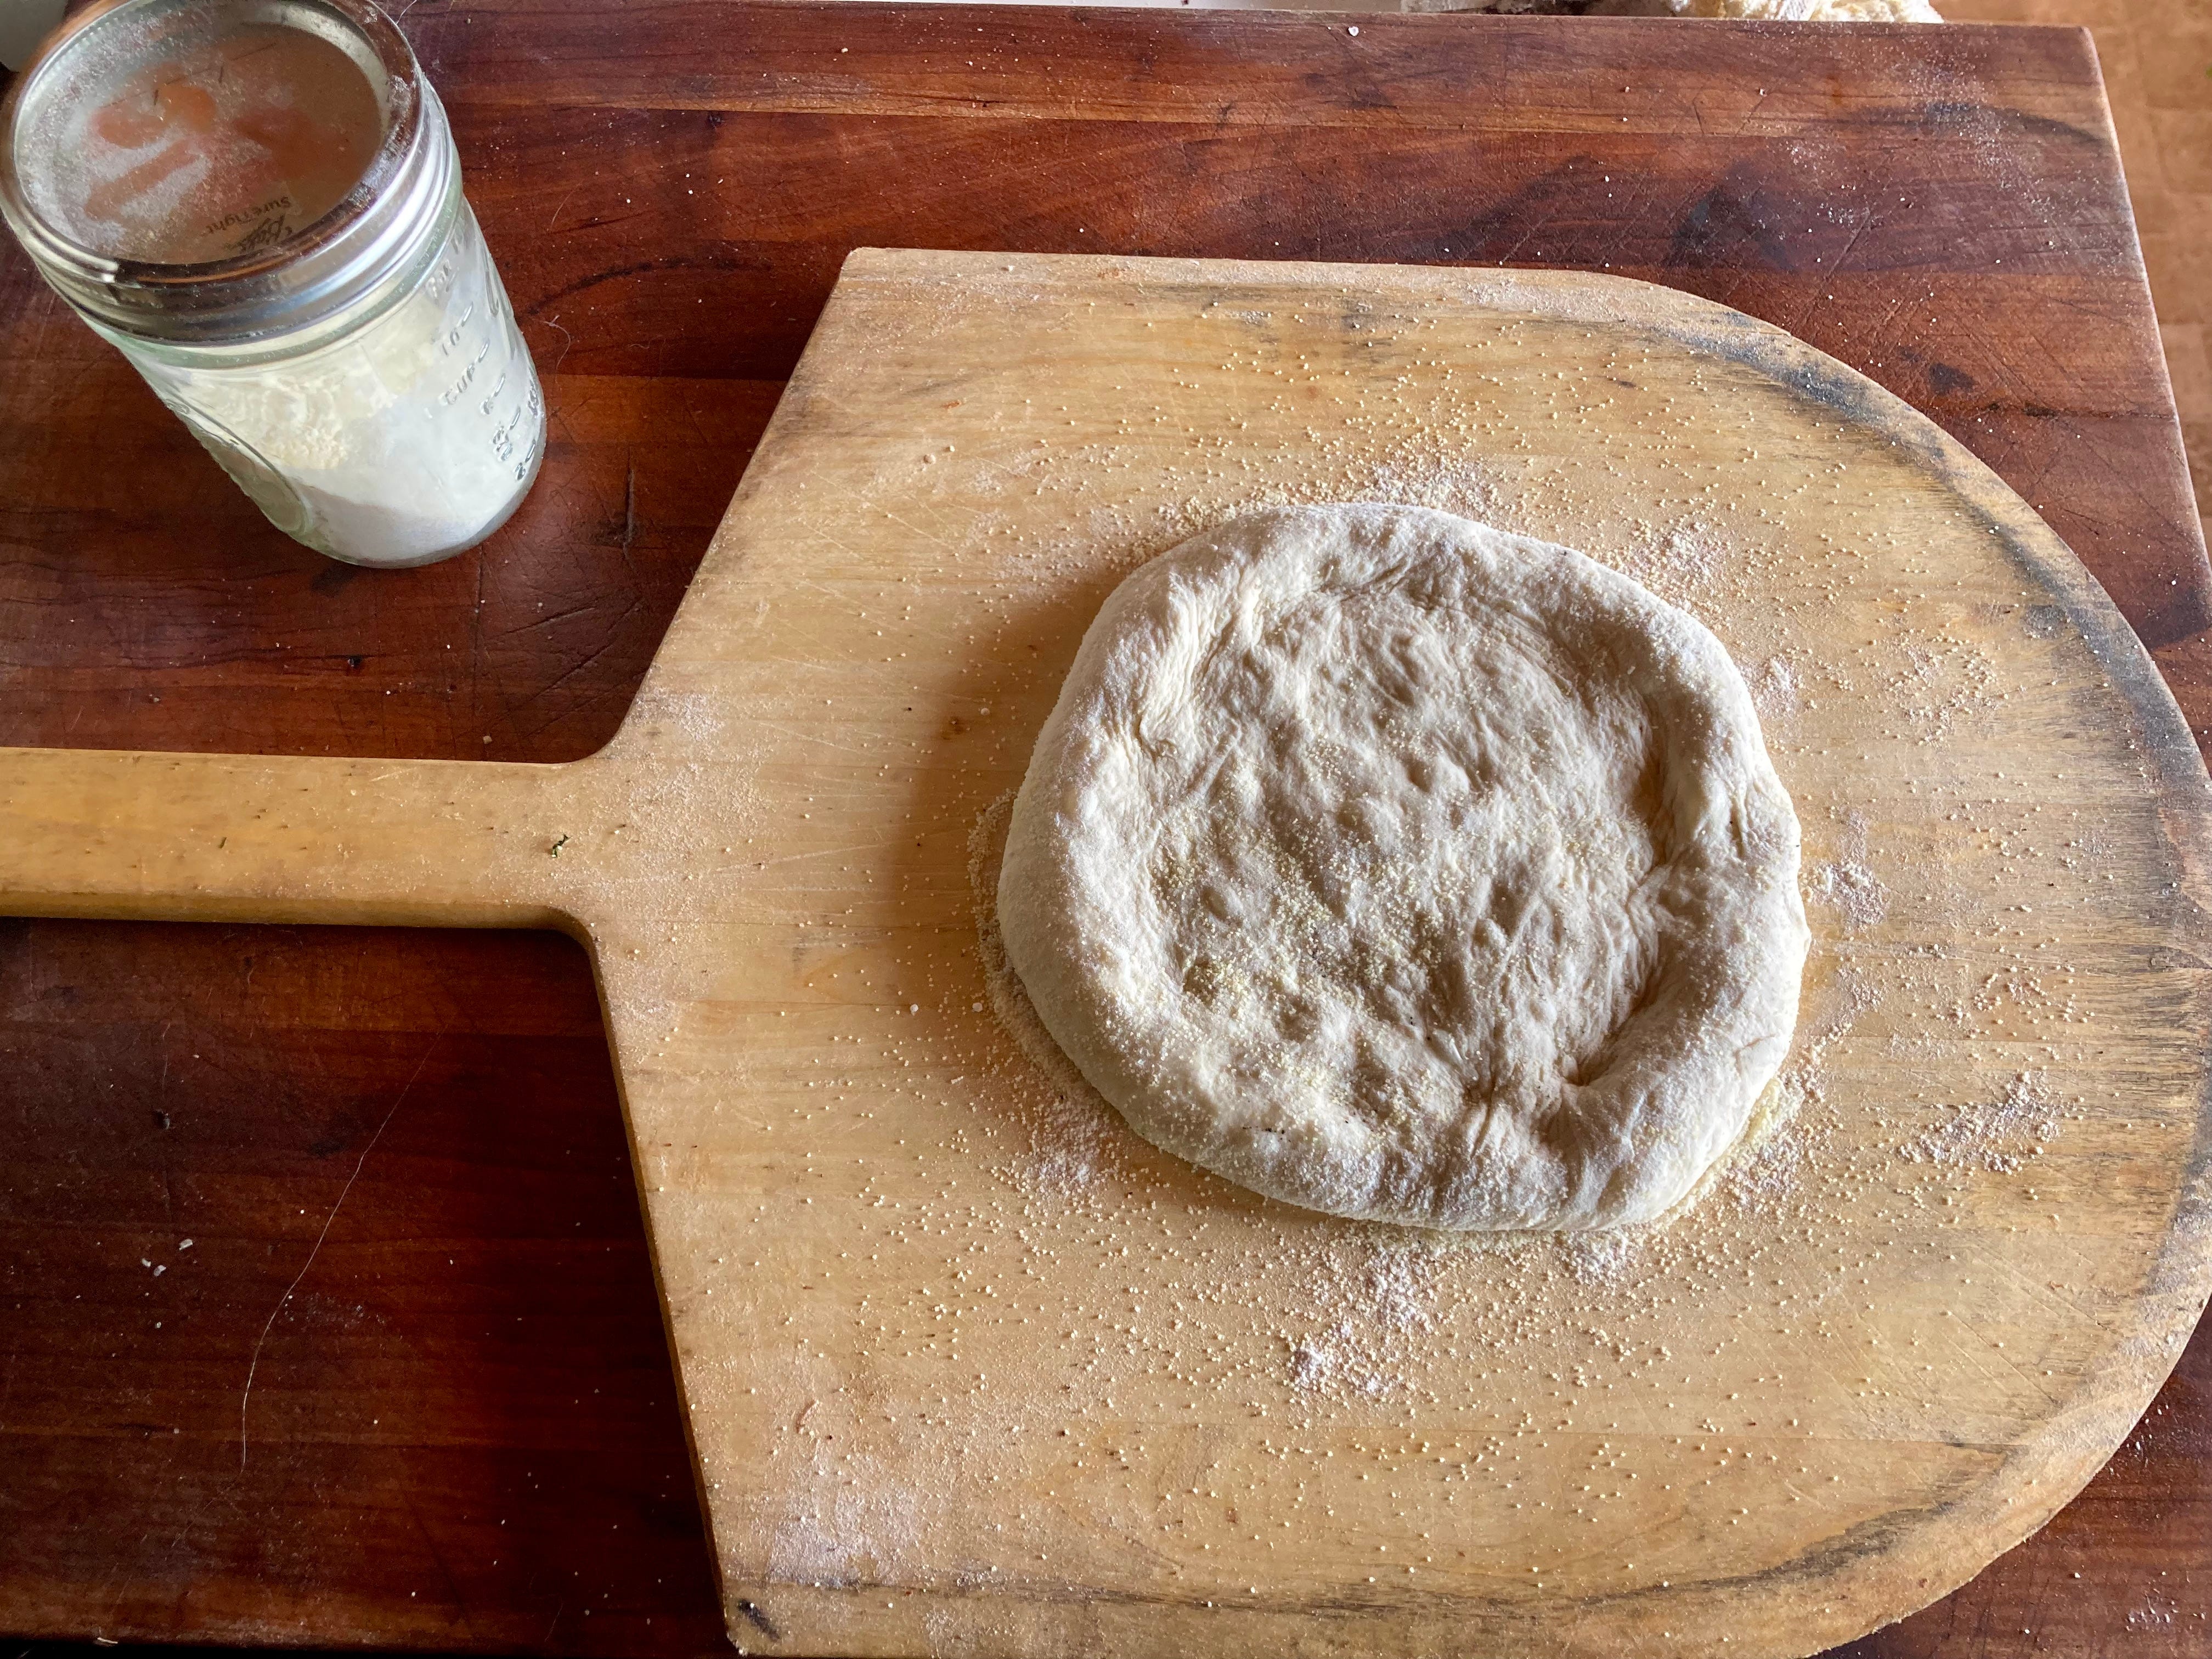
I recommend watching some youtube video on how to press down your dough ball and stretch it. I could write 2,000 words on this topic. It’s much easier to watch a few people do it and then try to copy their steps. Basically. Press down the center, pushing out toward your crust. Then once you’ve pressed it, starting stretching. You’ll eventually know how far you can go with your dough before it rips.
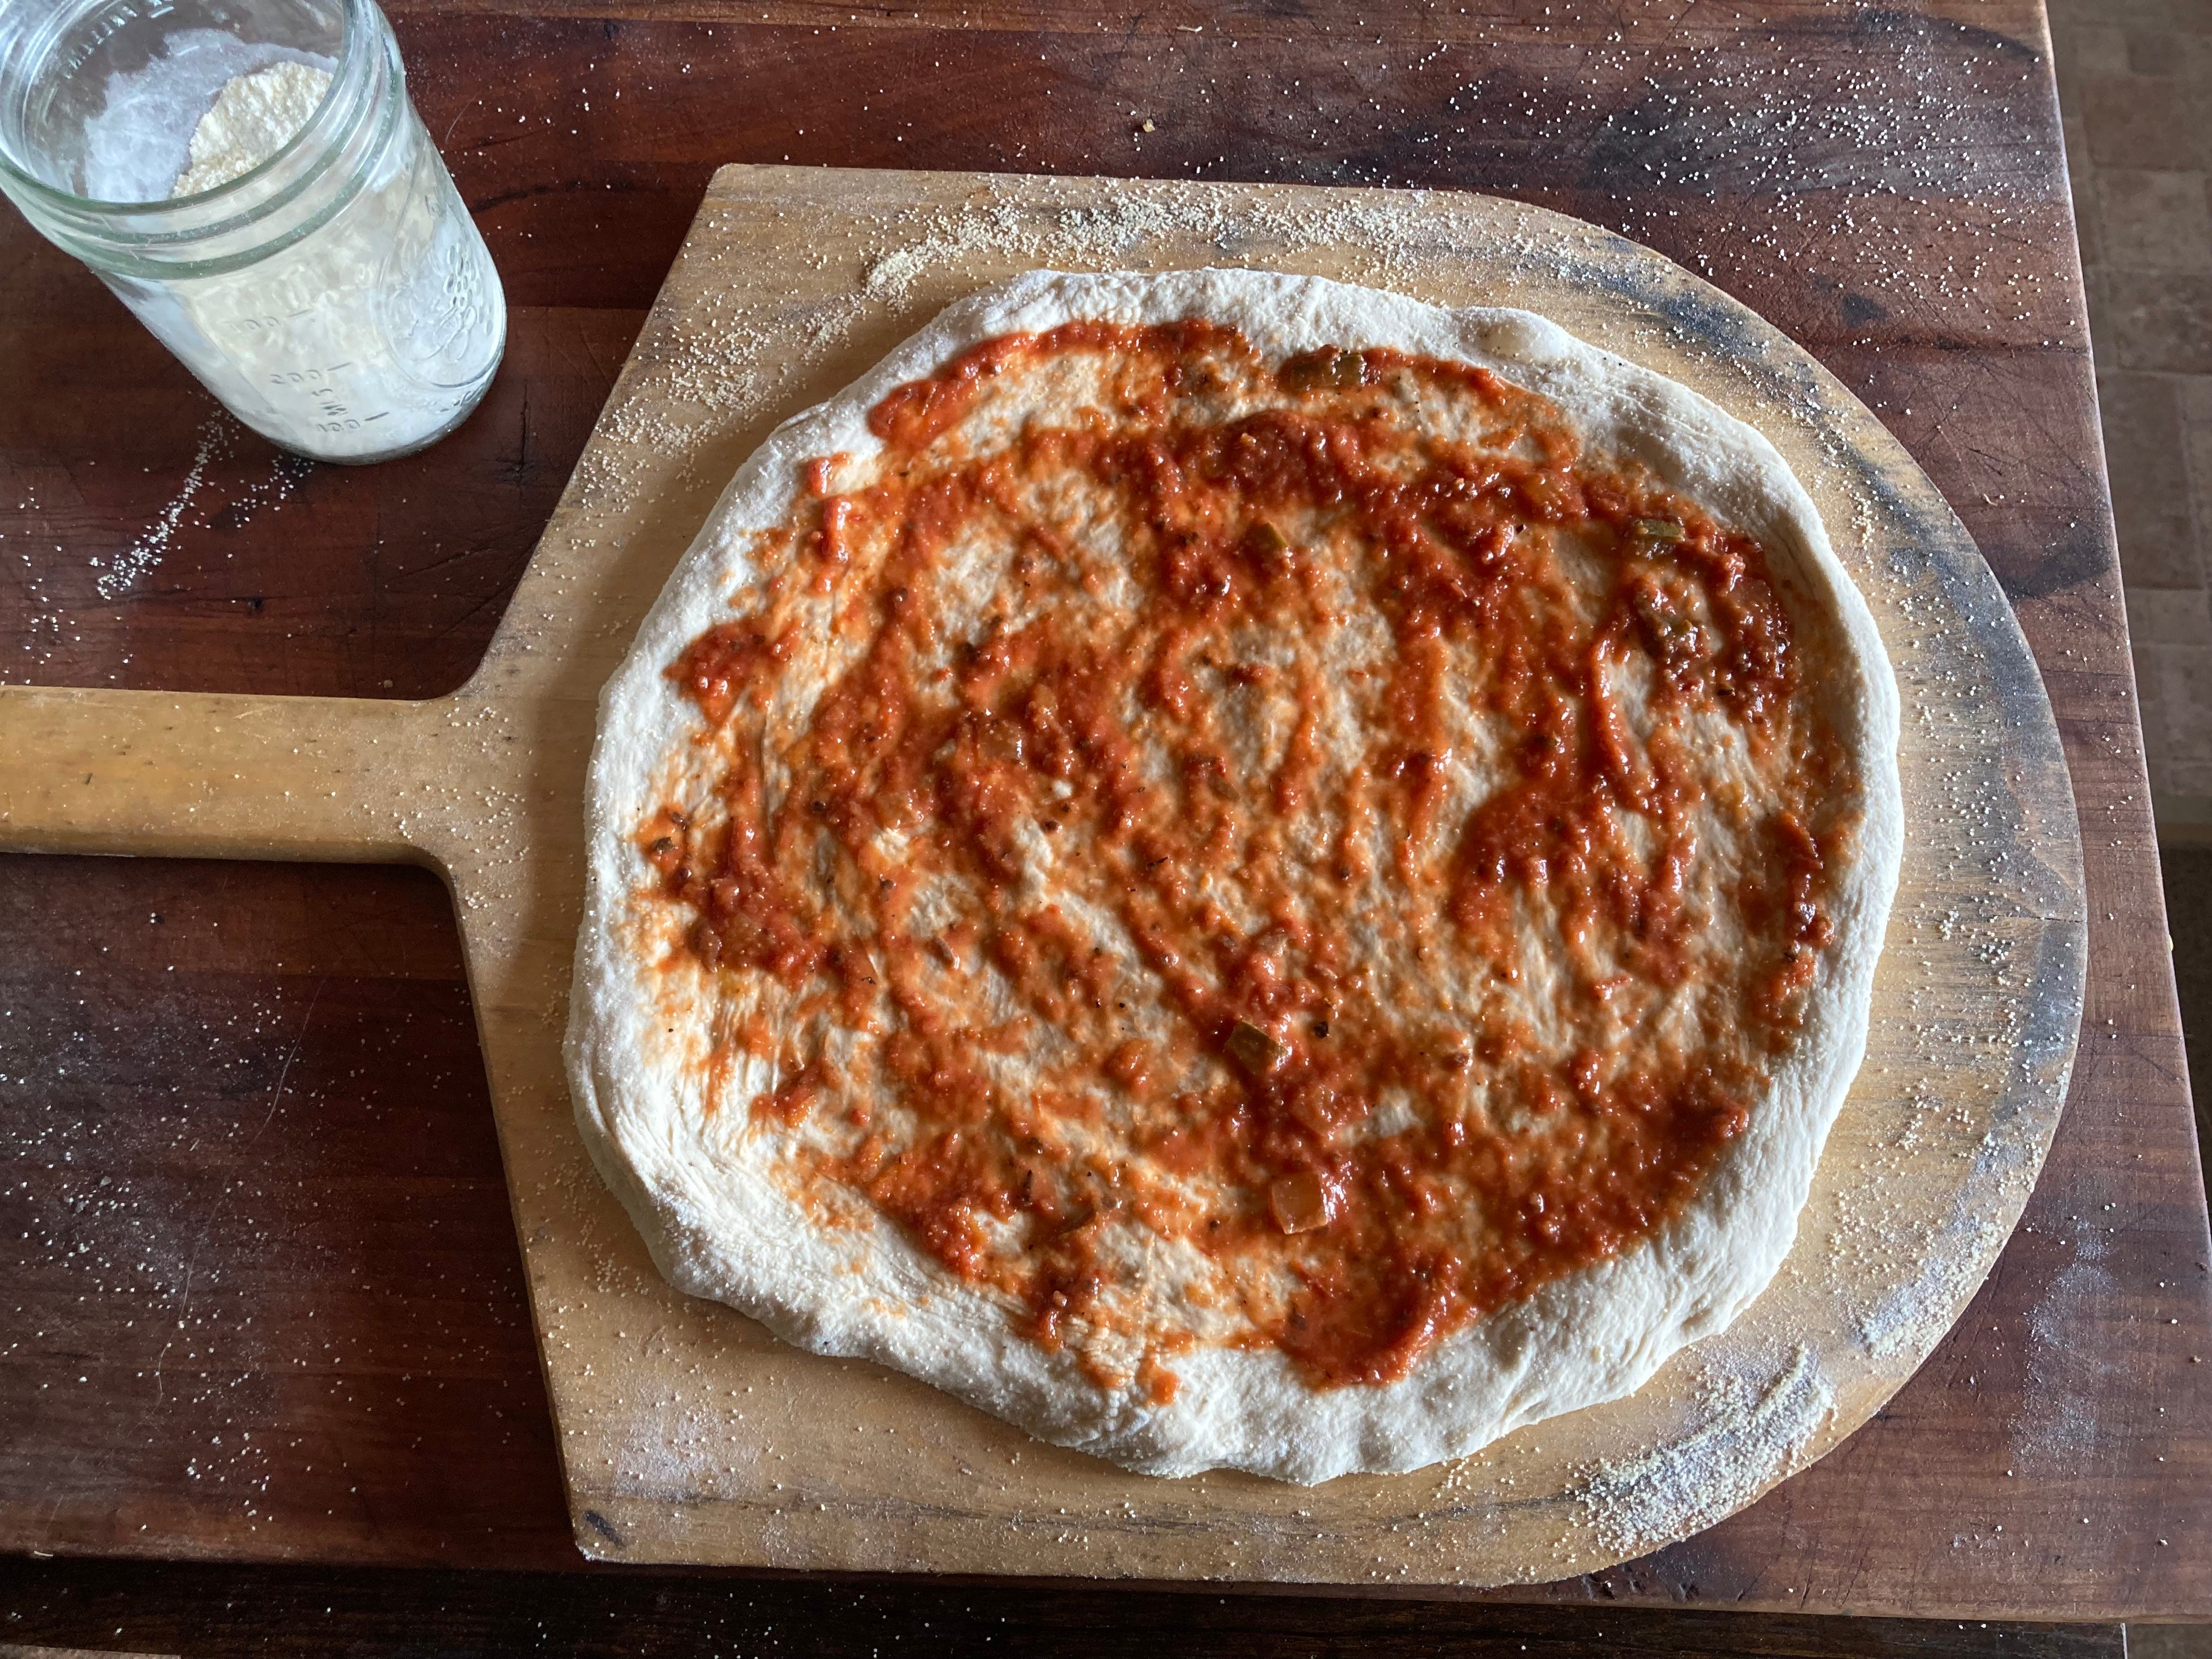
Toppings:
Sauce or don’t sauce. Red sauce, white sauce, pesto, bean sauce. Usually this goes first on a stretched dough. Sometimes I put red sauce on top of cheese and toppings. It’s a thing. When you put your sauce on, it must be cold or at room temperature. Hot sauce is death. It will make the top of your dough soggy. The cheese and toppings will slide around like a bog. If you’ve just made your red sauce and it’s piping hot, leave it off. In a pinch you can add some hot sauce for a pizza or two in a bowl over another bowl filled with ice and whip the sauce until it cools. It works, but is a pain in the ass and requires bowls that nest with room for ice, ideally crushed in between. I’d just go without. Learning: make your sauce ahead of time.
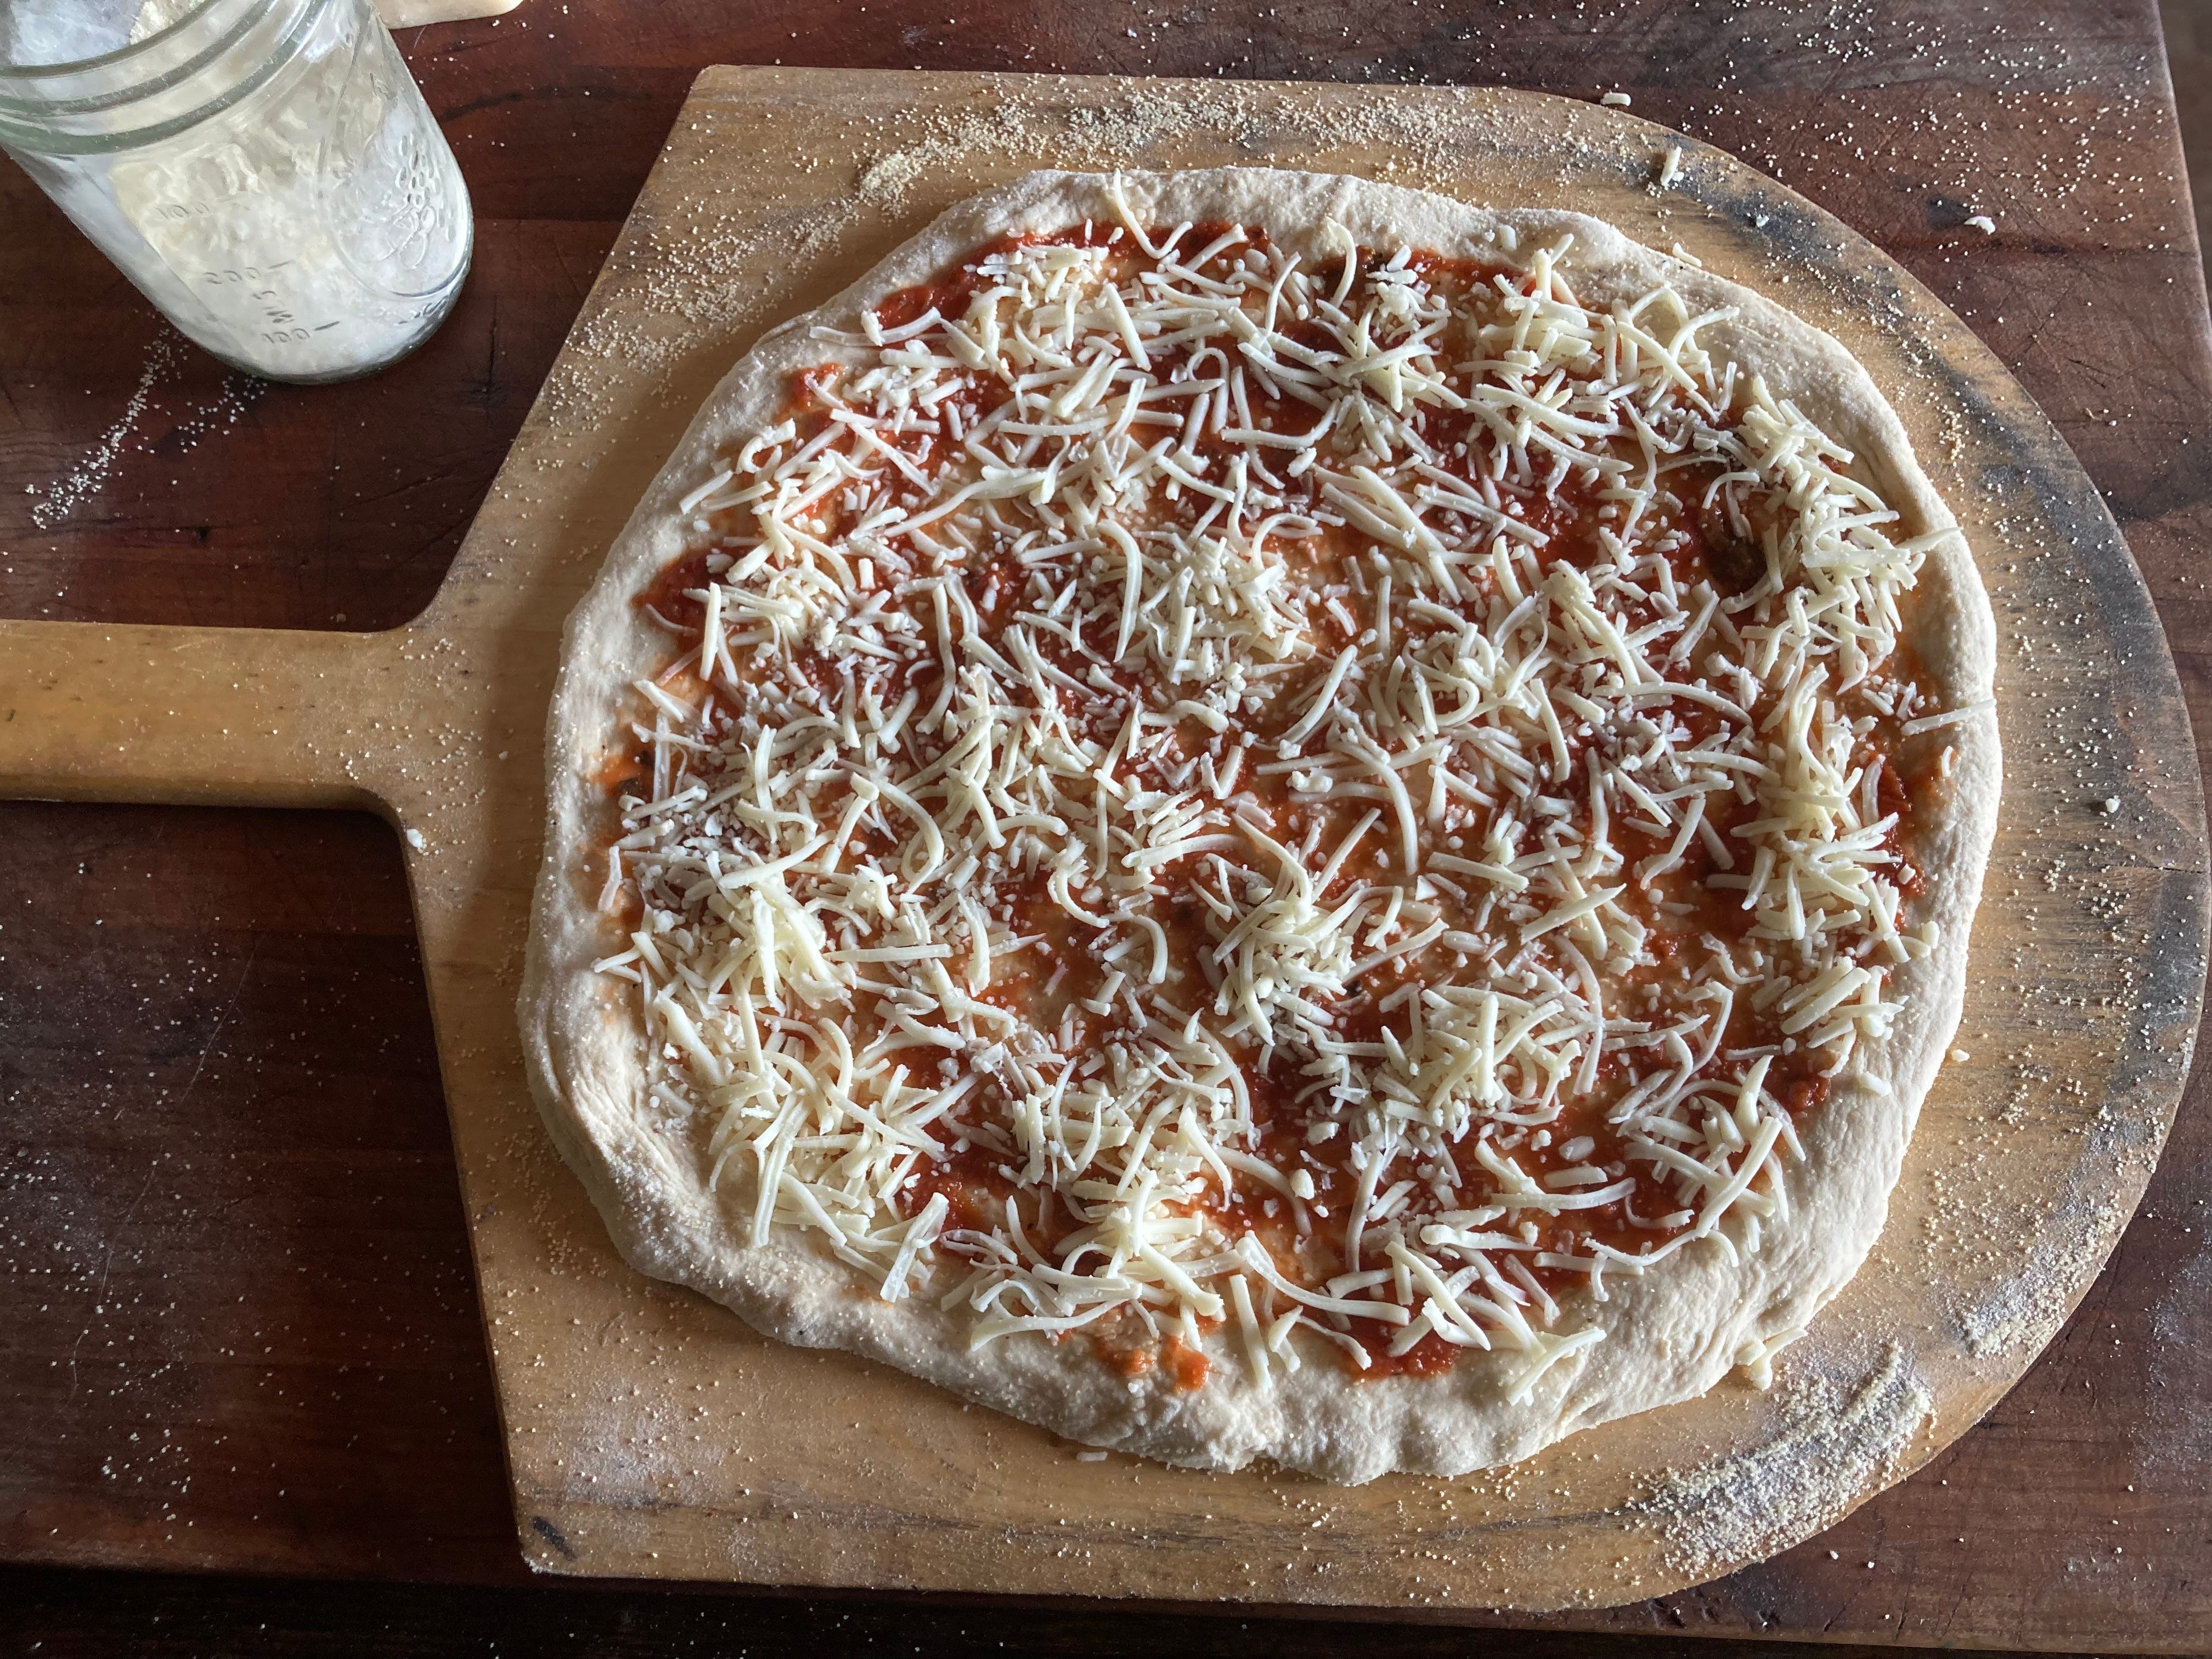
So dough first, then sauce. Usually the next step is cheese, then toppings. No issue with that. Sometimes, I want the cheese to help fry toppings like onions. I’ll put half the cheese on top of the sauce, then add the toppings including onion, then put the other half of the cheese over the toppings. This improves the frying effect.
If you are using herbs, fresh cracked pepper, chili flake, I recommend adding those last. Same with a finish of parmesan or romano. Some like to add the dry aged cheeses after the pizza comes out of the oven and is hot.
Feel free to experiment. The order, amounts and choice of toppings are where you are pizza boss, artist and chef. All of the things you want to try, you should try.
I have found that less is more. There is a temptation to put a lot on there. But in the end, try using less sauce, less cheese than you think you need, less toppings.
Baking Results
Time for some honesty here. I’ve been working on this post much longer than expected because the first batches of dough #1 and #2 I made had more like 70-72% hydration and were hard to work with. I also may have under mixed both batches. Short version: I made #1 in the mixer, assuming most people will do that. I usually make #2 as my daily driver [regular] dough in the mixer. I usually mix all my breads with my hands only, so #2 is like my “vacation” dough that I use a mixer for. I’m a little out of my element when I don’t “feel” the dough with my hands. So I missed the “too-wetness” of the dough. #3 is supposed to be 73% so I just went with it.
More honesty. I’ve found that I don’t really ferment my pizza doughs long enough. Part of the reason I use diastatic malt is that it speeds the conversion of starch to sugars and increases the extensibility [stretchability] of the dough. My deep dive has me now believing that longer ferments will accomplish the same thing with better flavor, crumb and spring. Lesson learned. I modified the methods above. So I made a second round of dough. I baked pizzas from both batches of dough. The first with the doughs as initially made [wet,] using lots of flour to keep the too-wet dough from sticking. The second round I let the doughs come to room temp for 4 hours giving them additional proofing time.
All three doughs came out well. The poolish dough #3 had the best flavor and best spring. The basic dough was surprisingly good, especially compared to the amount of work involved. #2 is probably the easiest to stretch and is also good. It’s method is designed to give you the most ready to use dough of the three. You can get away with skipping the overnight refrigerator ferment with it.
I won’t get too far into the subtleties because #1 and #2 were pretty close. #3 had a more open crumb and was both crispier on the outside and softer on the inside. All three made good pizza.
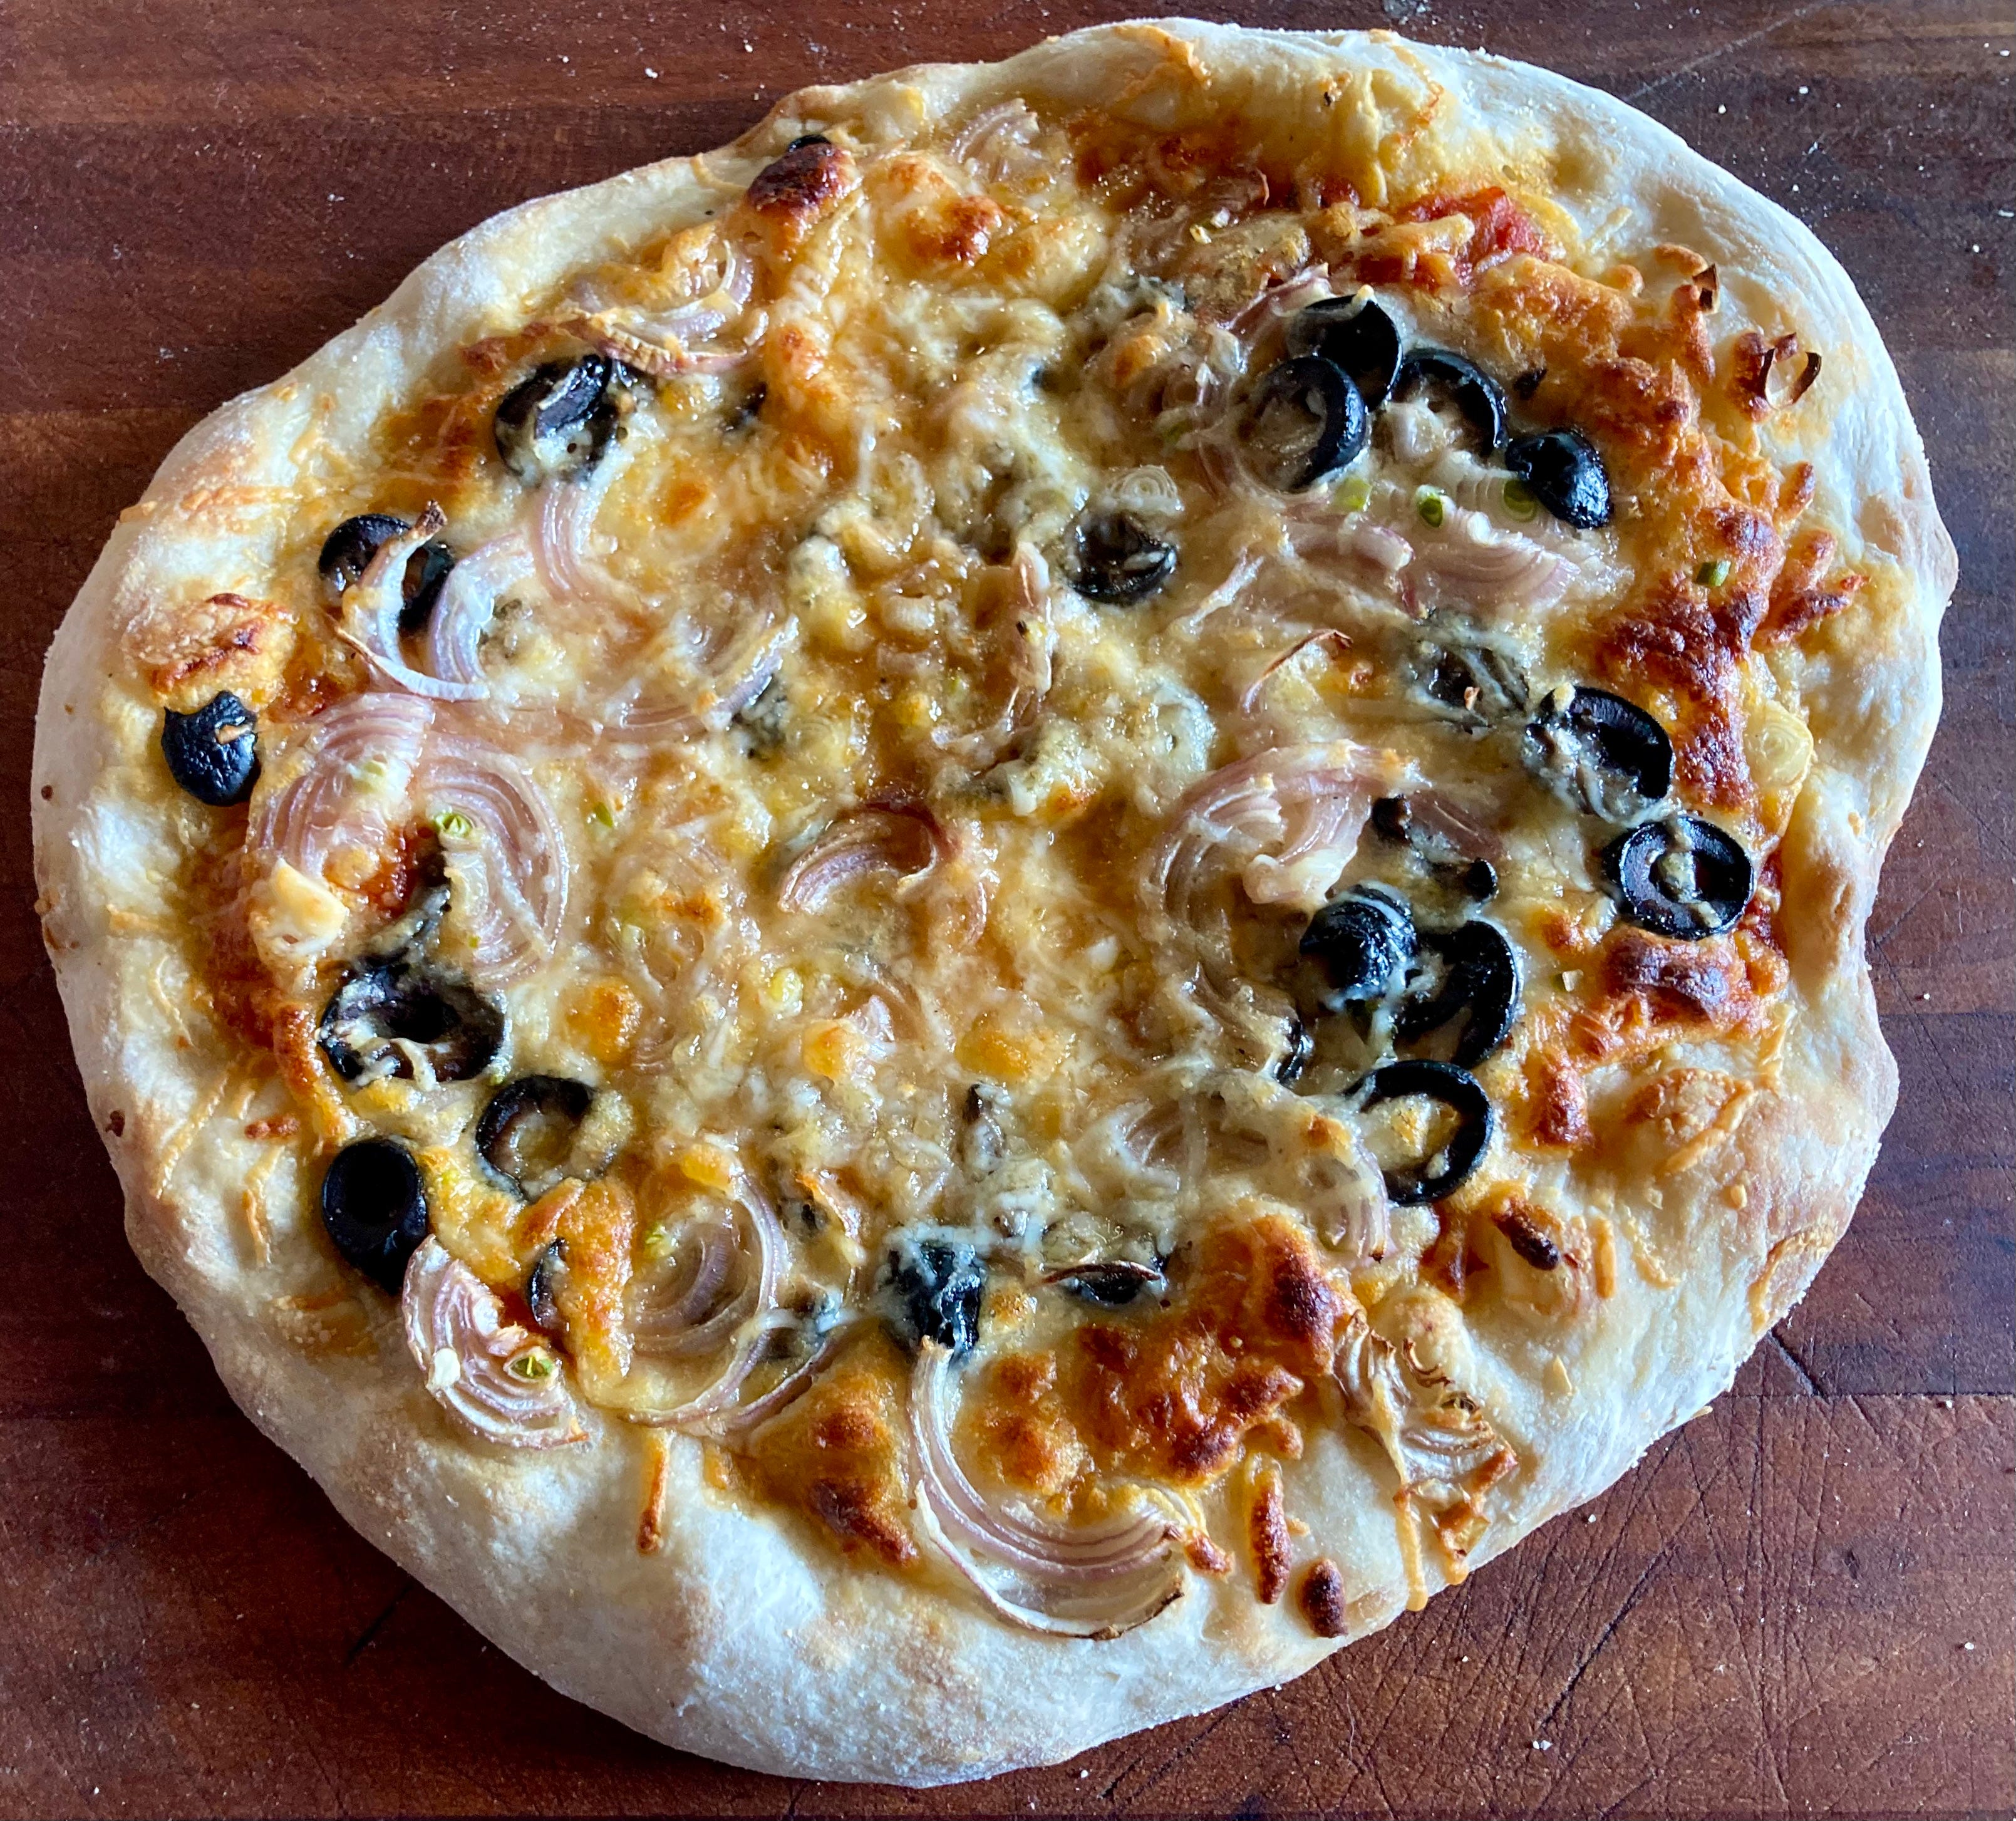
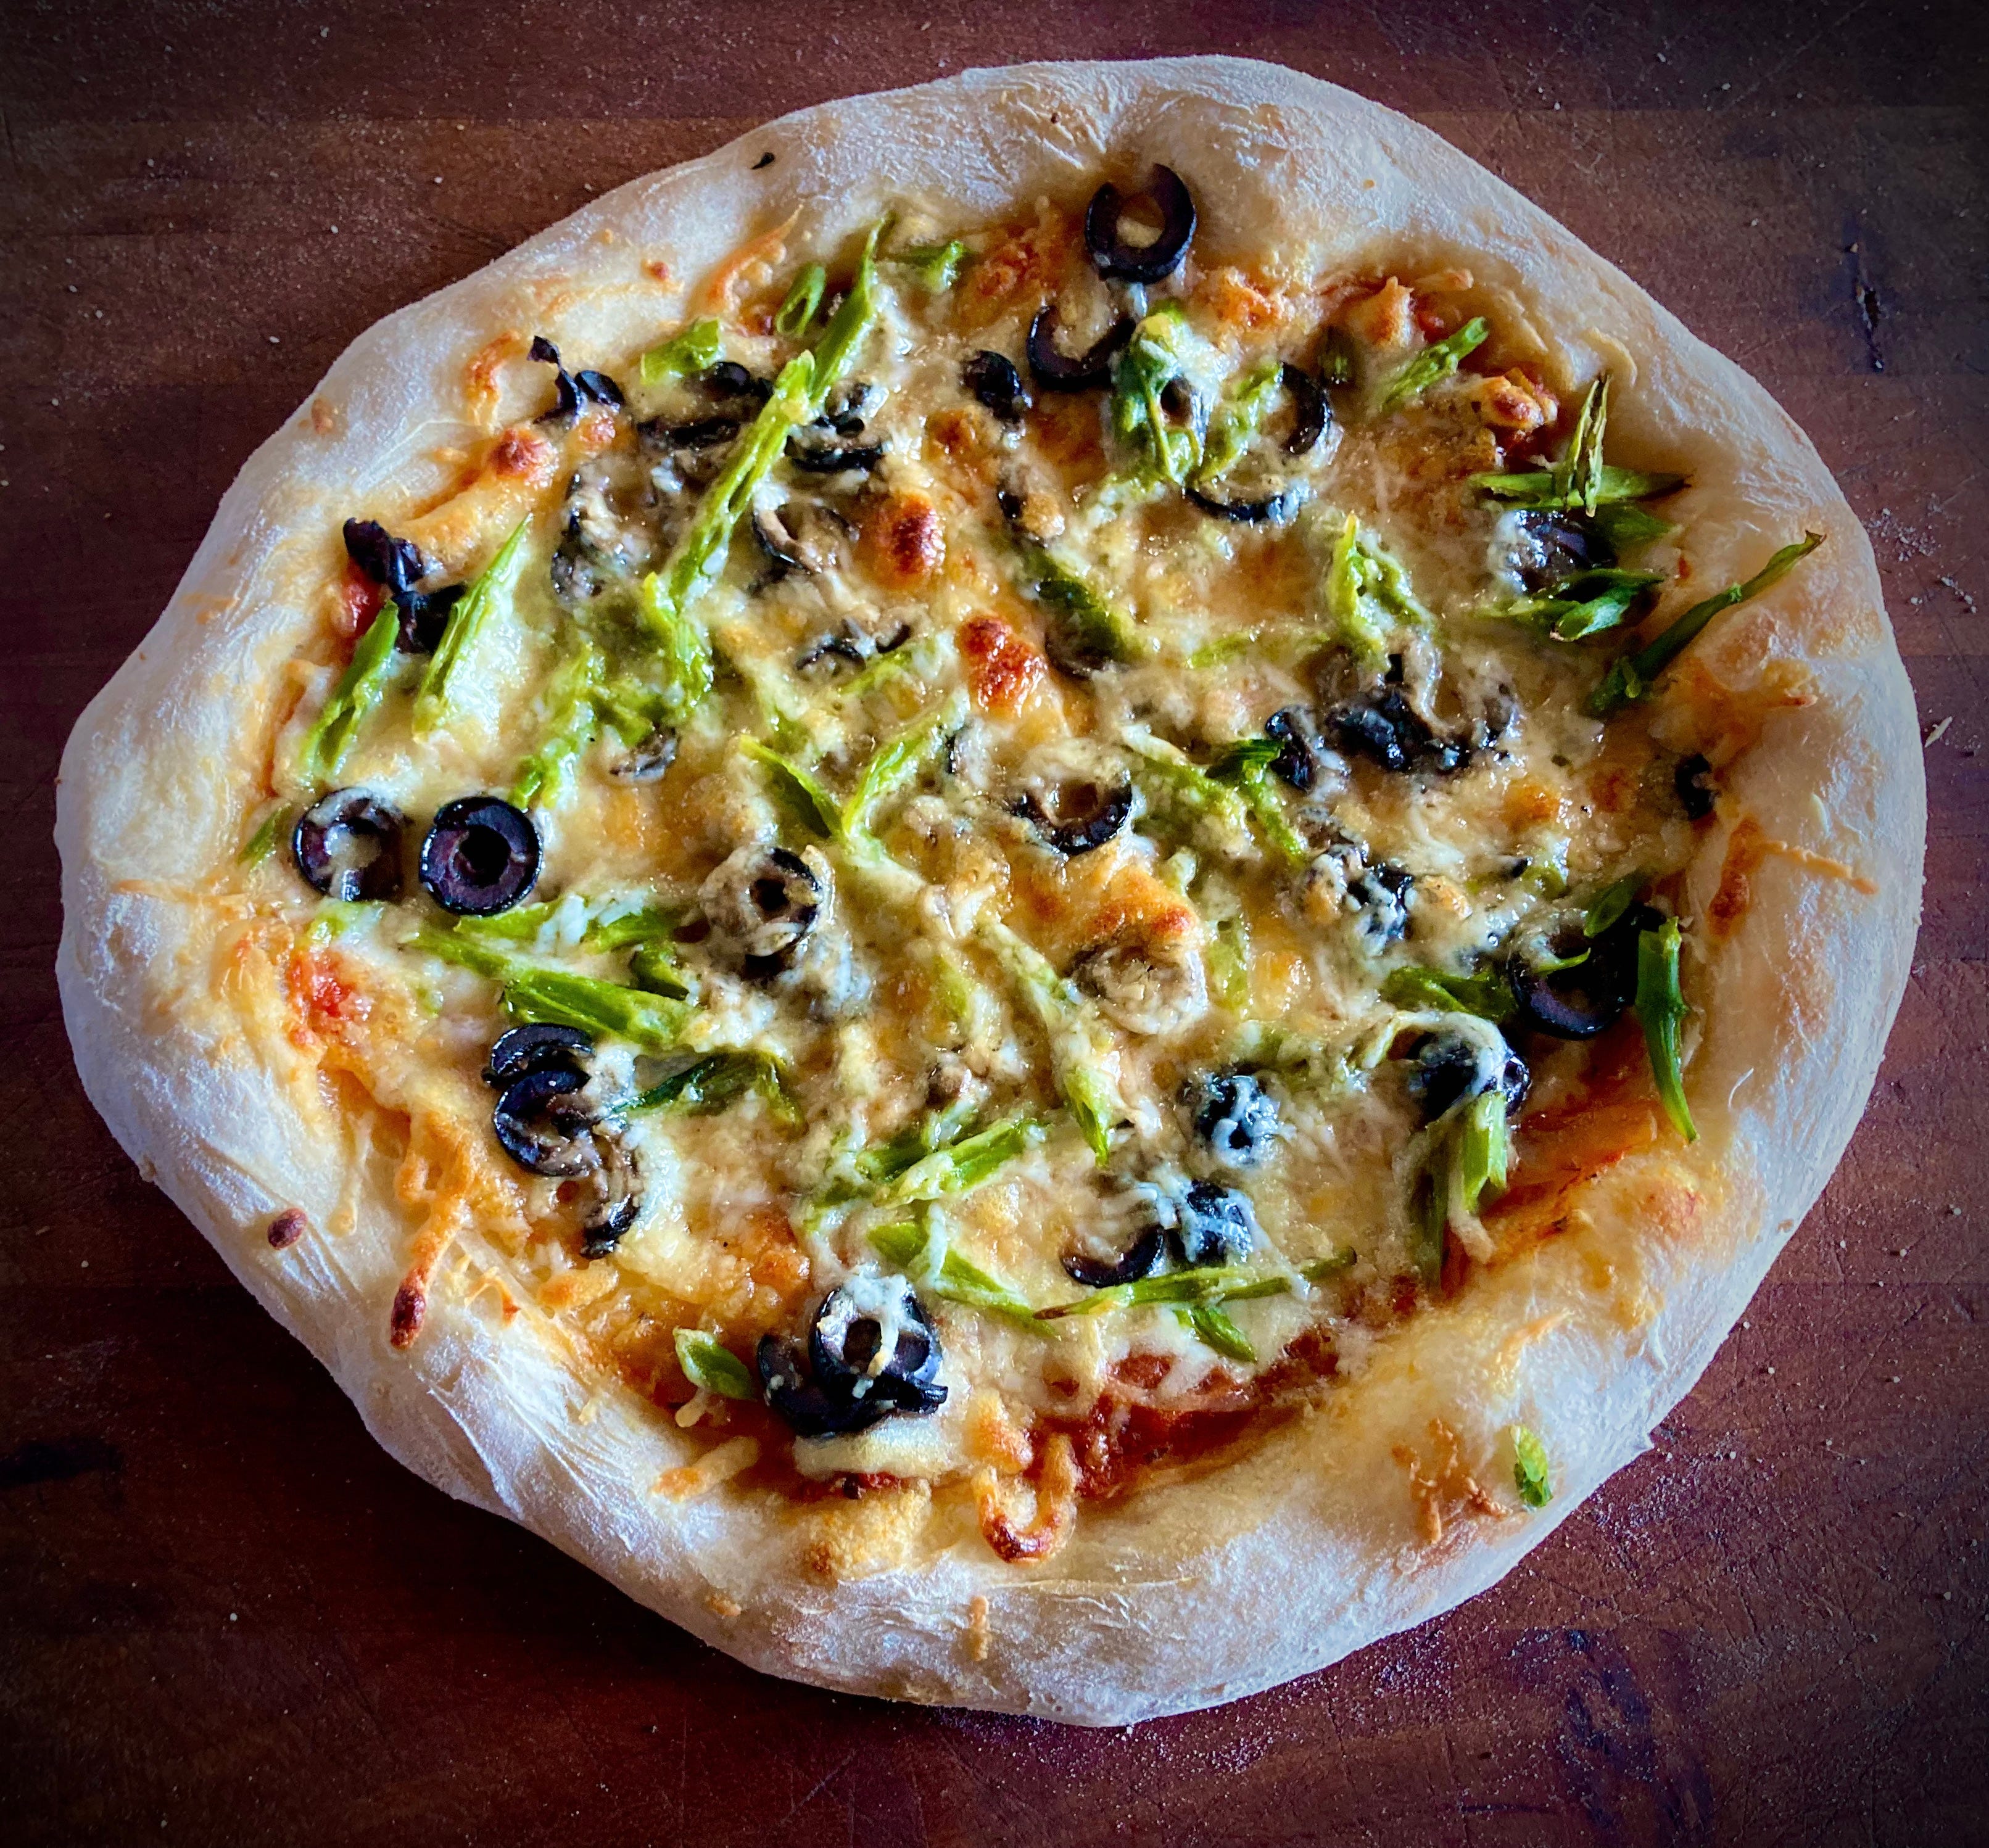
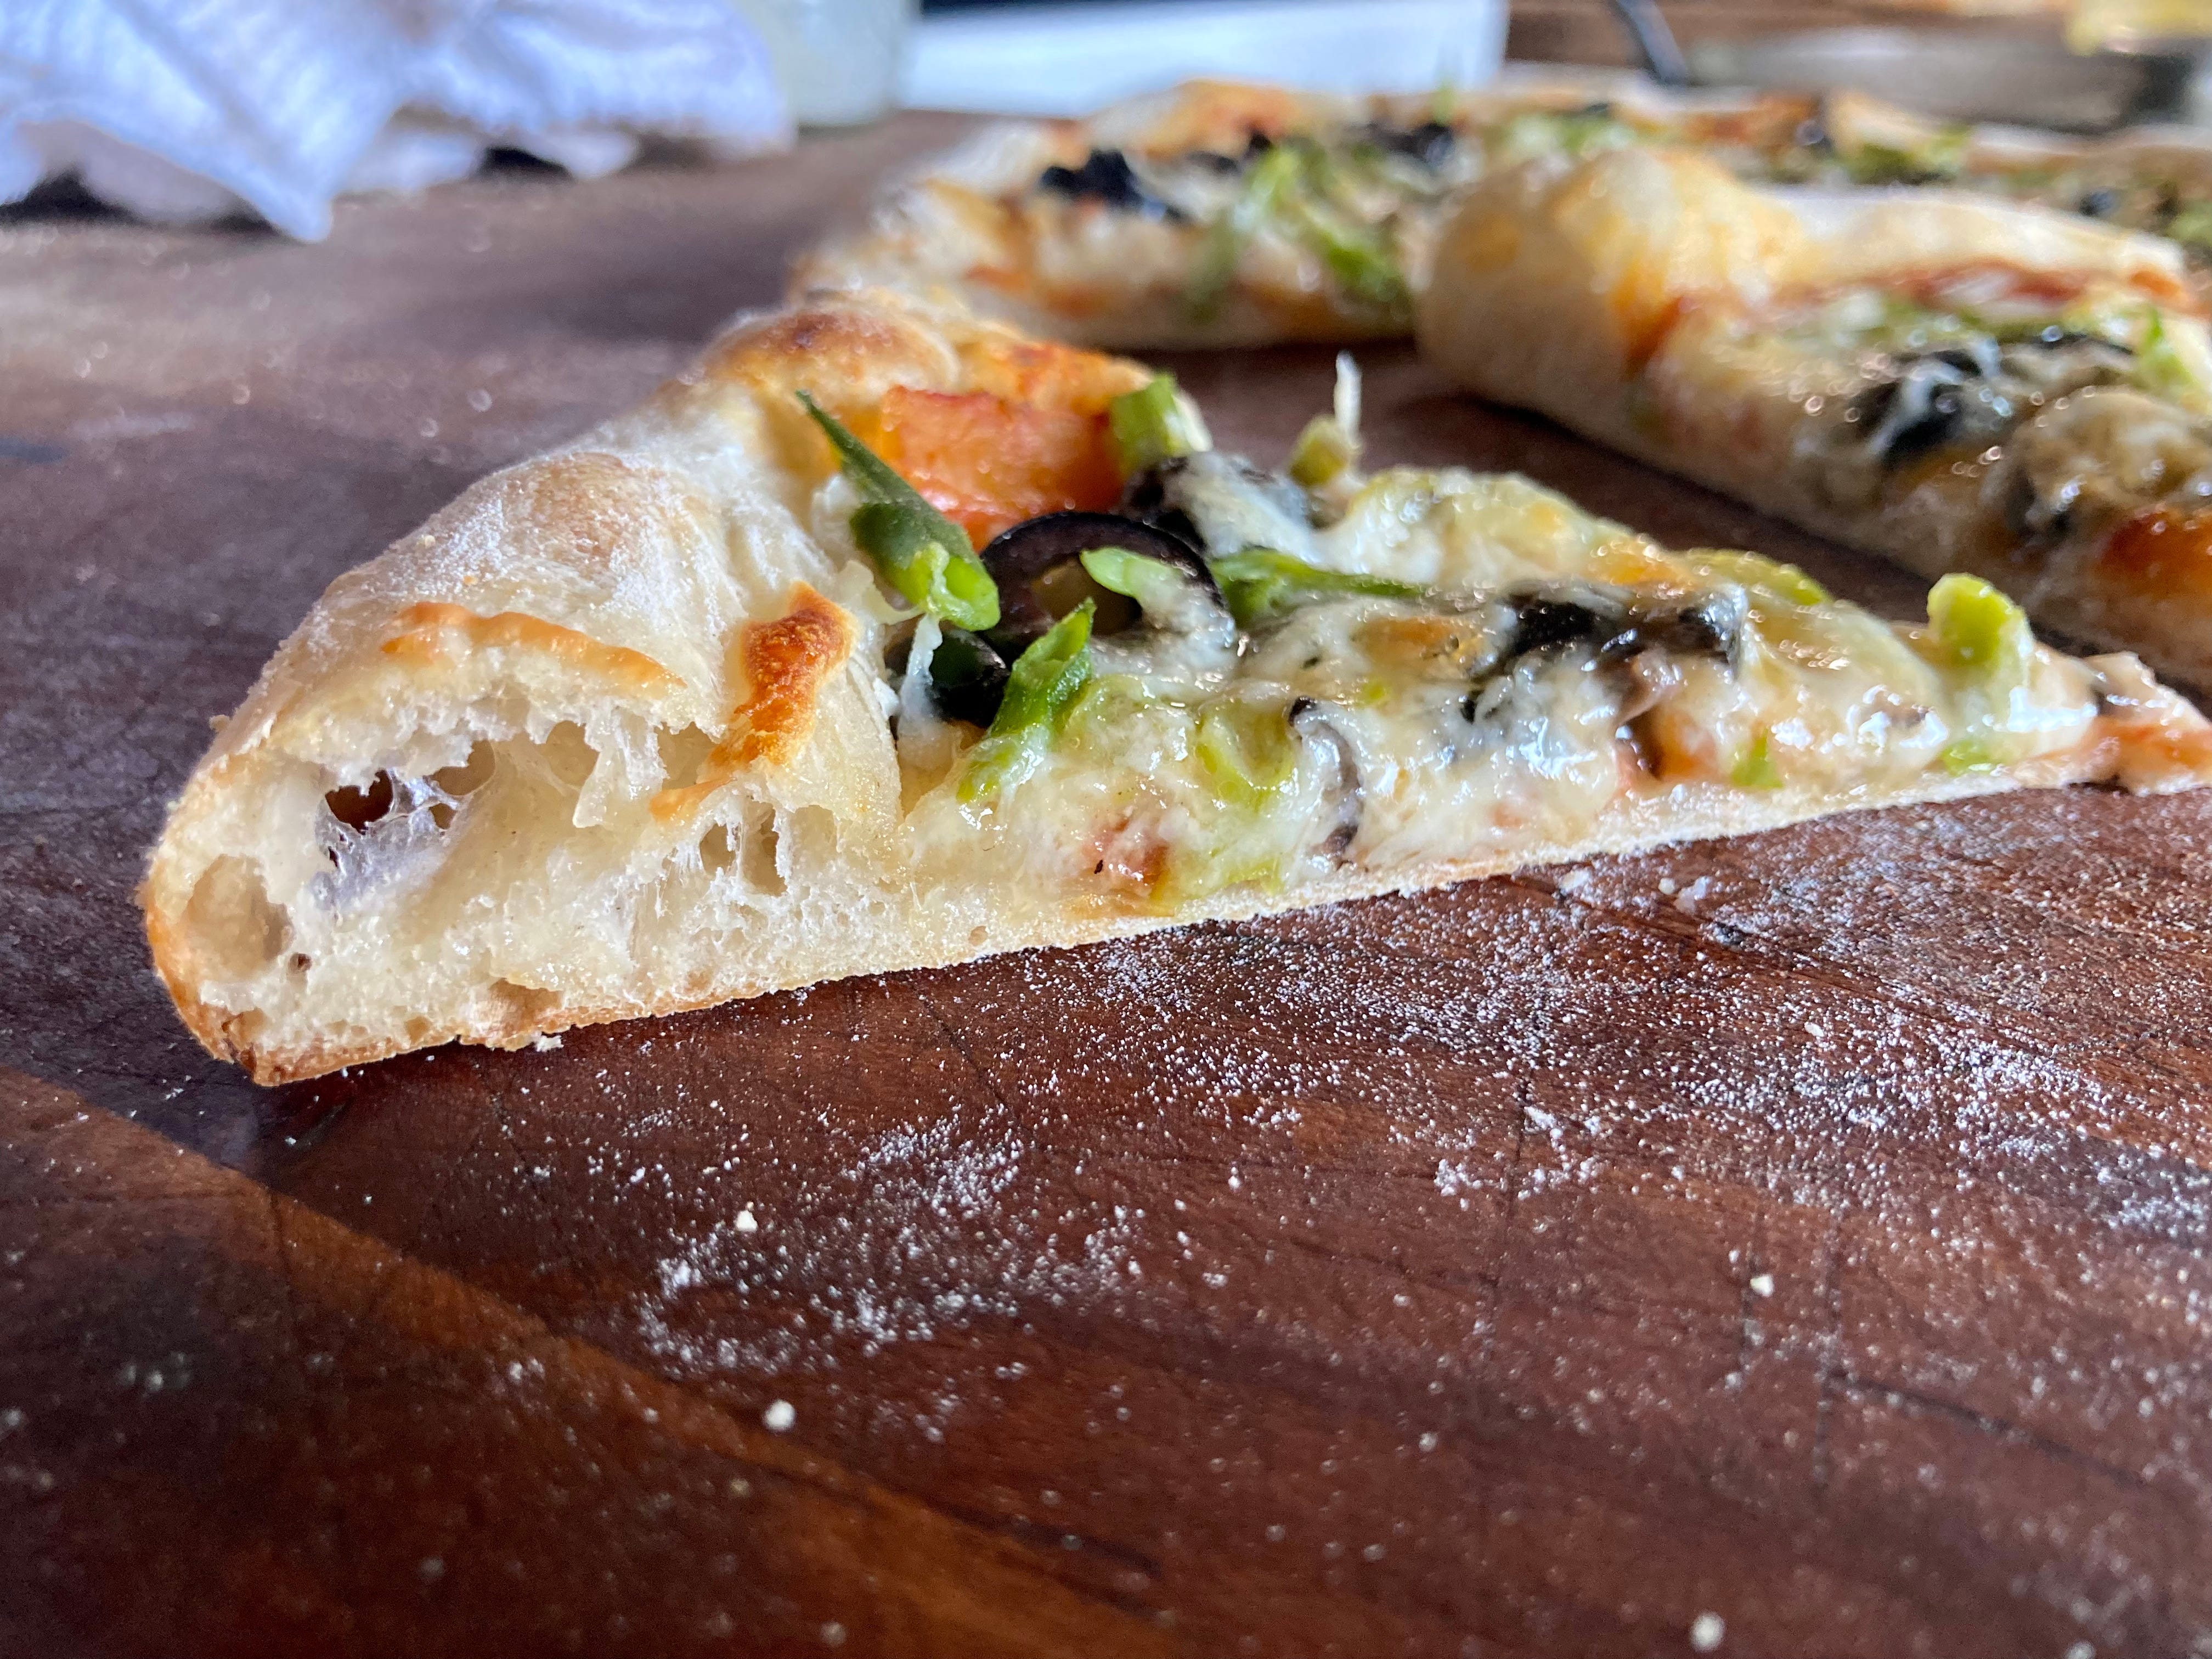
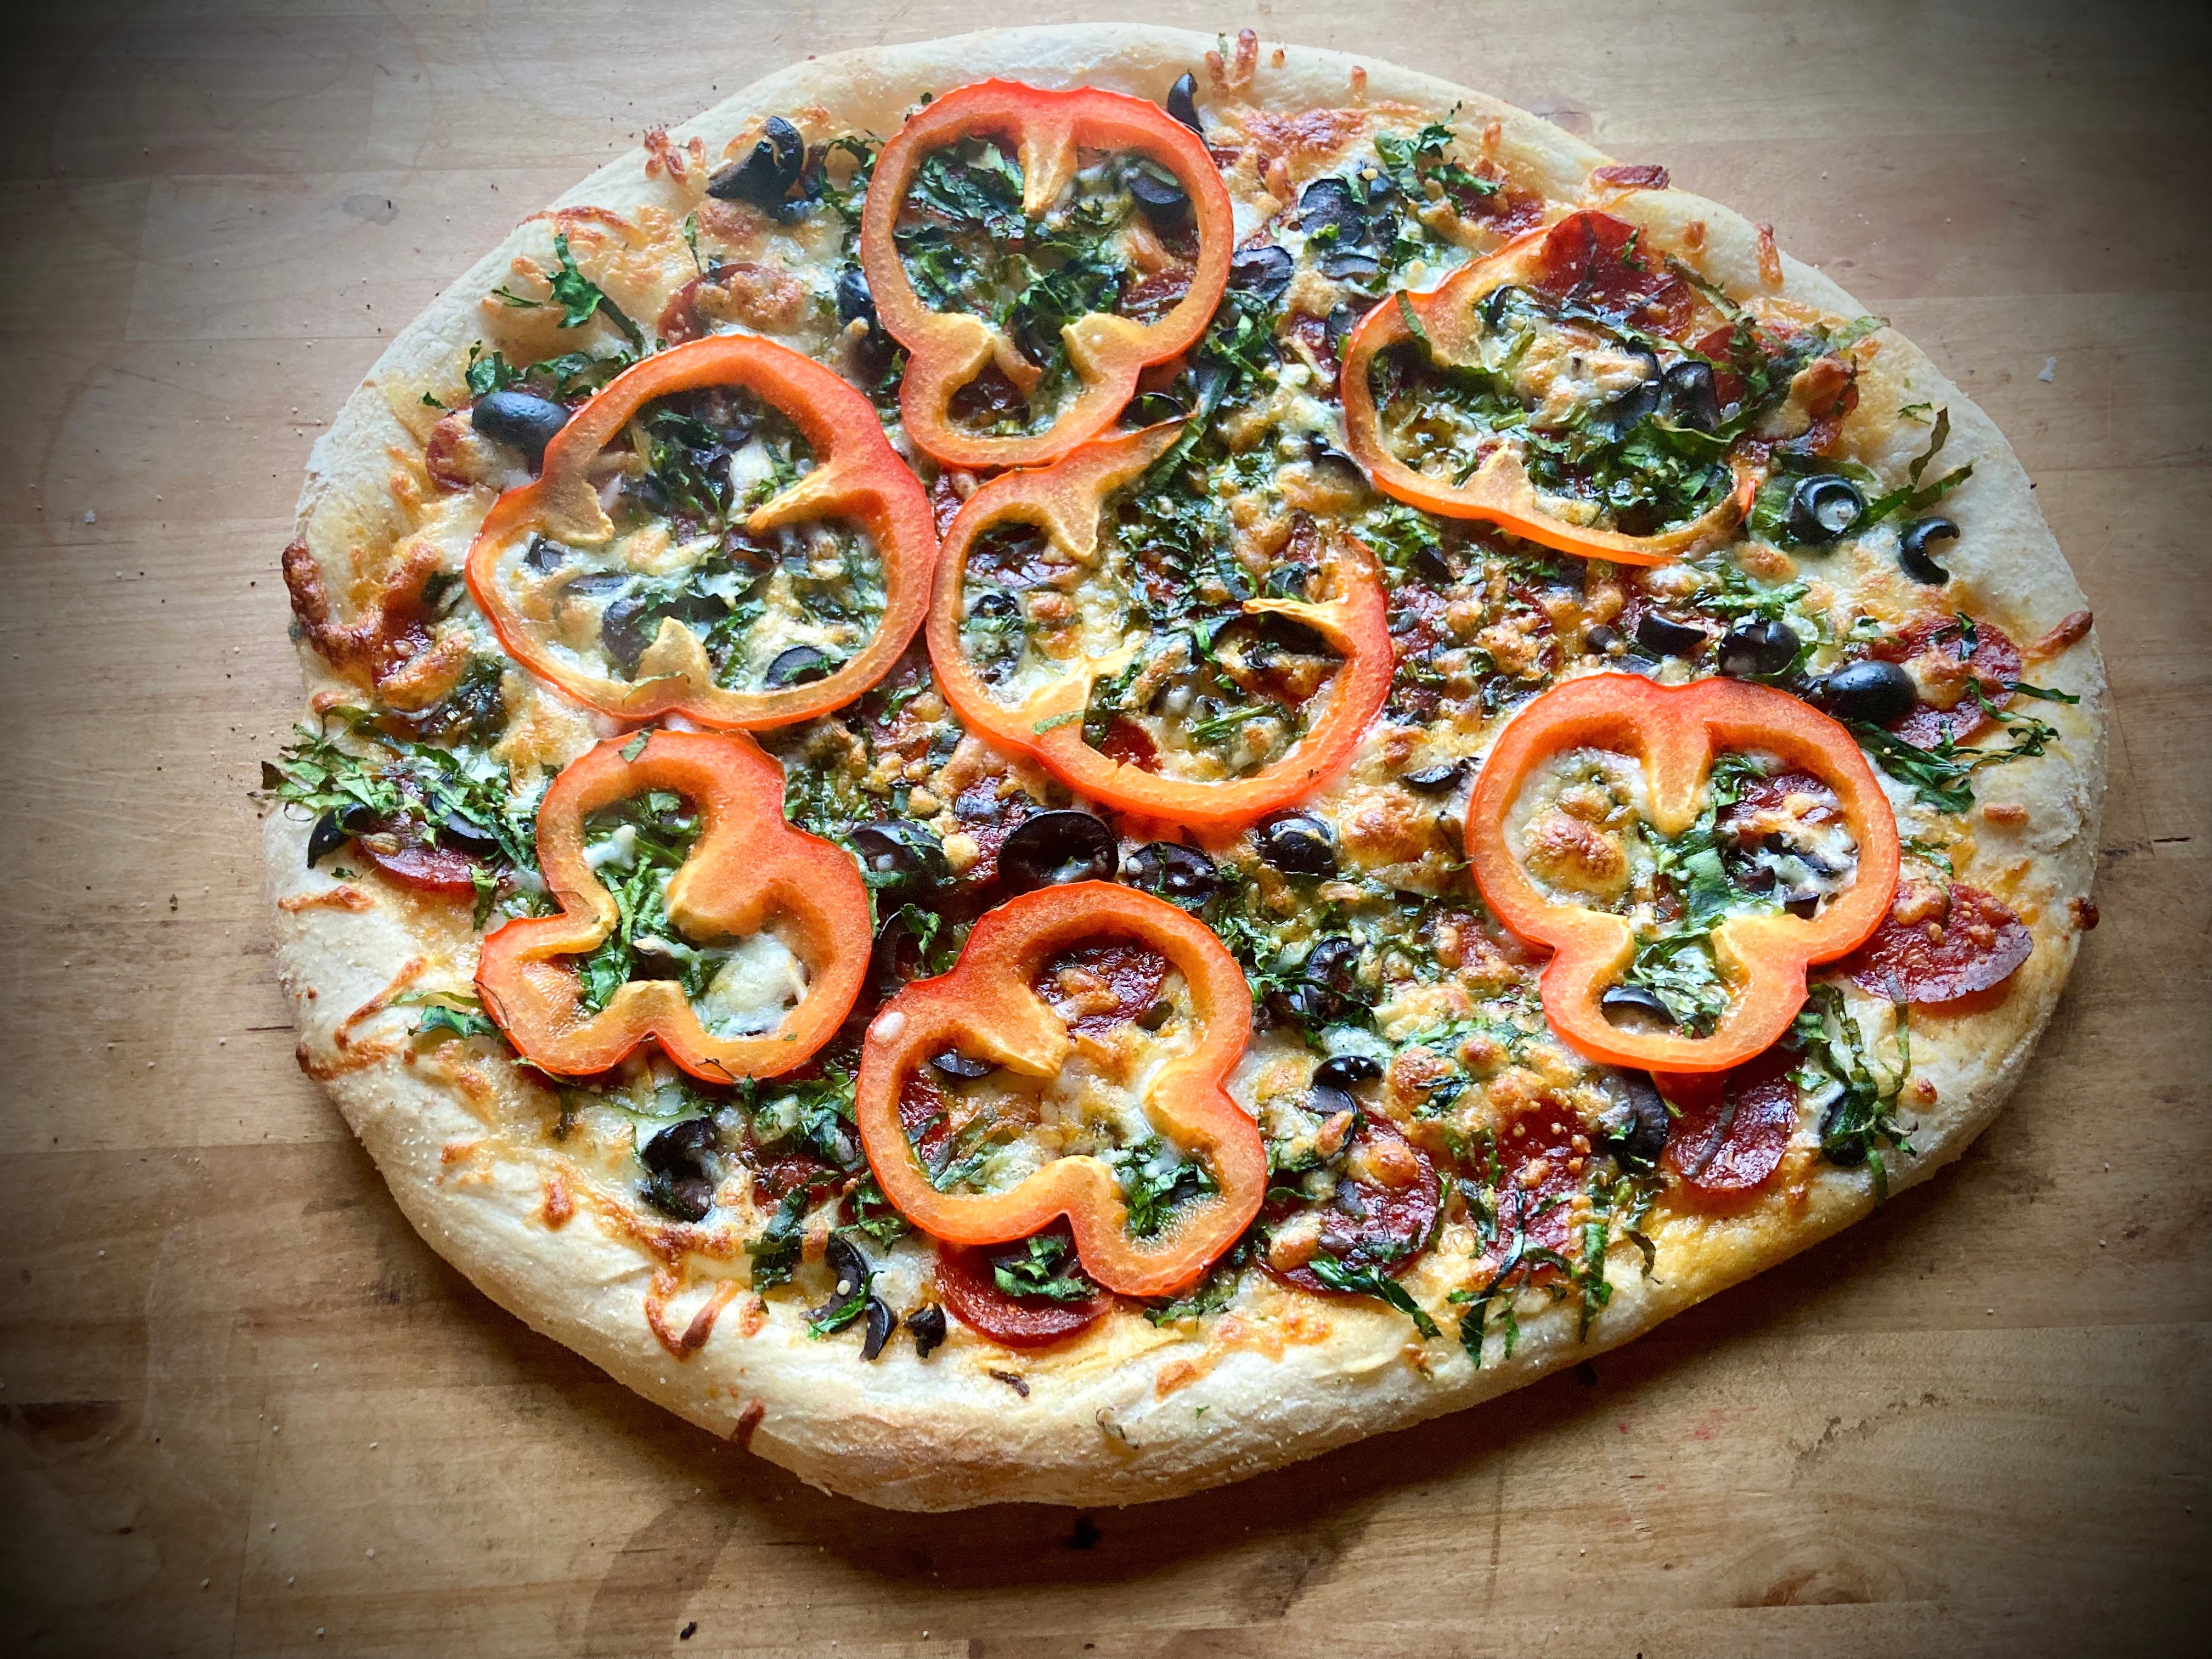
For the examples below, I skipped the overnight refrigerator ferment. I did some testing with the overnight ferment after realizing all three of these pizzas were underdeveloped. I would have served them to the public for sure, but I knew they would be better with more mature dough.


Here are photos from the mature dough #2 and #3:
Summary:
Damn, if you’ve made it this far I congratulate you!
I’ve been working on this post for longer than I expected. I had some real set backs. Not what I expected, but the project has taught me a lot when I thought I already knew this stuff. There’s probably a whole post to write discussing that acknowledgement.
Pizza dough is pretty straightforward, unless you want to get really fancy. Then you can make it as challenging as hand-made puff pastry. But this post has been about getting started and learning. You can make your own dough. It’s not expensive or time consuming [except waiting between steps.]
Once you get our own dough in a good place, the assembly and baking will come quickly. I’ll get to that in another post. But be assured, if you can figure out dough, the rest will come easily.
These days, you’ll save money making your own, because mediocre pizza isn’t cheap these days. And you’ll almost surely have better quality ingredients than shop pizza. You’ll be the pizza boss, controlling combinations, cheese, done-ness [is that a word?] and slicing. If you want 6 slices or 7 slices or 8 slices—you can have it your way.
For me, it’s been a long journey that I continue to enjoy. I’m always learning and sometime re-learning [HA!] And I’ll be writing up more advanced posts on tools and equipment to help you in the future. Happy pizza.
Give it a try!
As always, thank you for reading my food pandering and wanderings away from supermarkets and into local and wild worlds. It inspires me that people follow me and subscribe. Know that I am honored by your attention and feel blessed too.
Start with whole foods and cook them yourself. Or sucker your children into cooking like my mom did. Eat slowly, together mostly and deeply enjoy your food—no matter what the rest of the world thinks. Food is life.
Good cooking, good eating, good loving - K. Paul
This is just wonderful John. I’m not much of a baker so I’ve not heard of diastatic malt. It’s a public holiday here, so it seems like a great day to make and eat pizzas.
That’s after I mow the lawns.
I’ll report bake with results.
Great article, obviously written with love. Now you have me thinking and planning :)